I have been slowly making my house a home. Very slowly. One of the two rooms that is painted is the boys room (yes, they share) which was basically done except for the absence of the bedside table.
We were given an old but solid wood table in a blond colour. That wouldn't do. We've got a whole vintage-y retro thing going on.
So, as any good DIYer, I refinished it. And this is what I did to it...
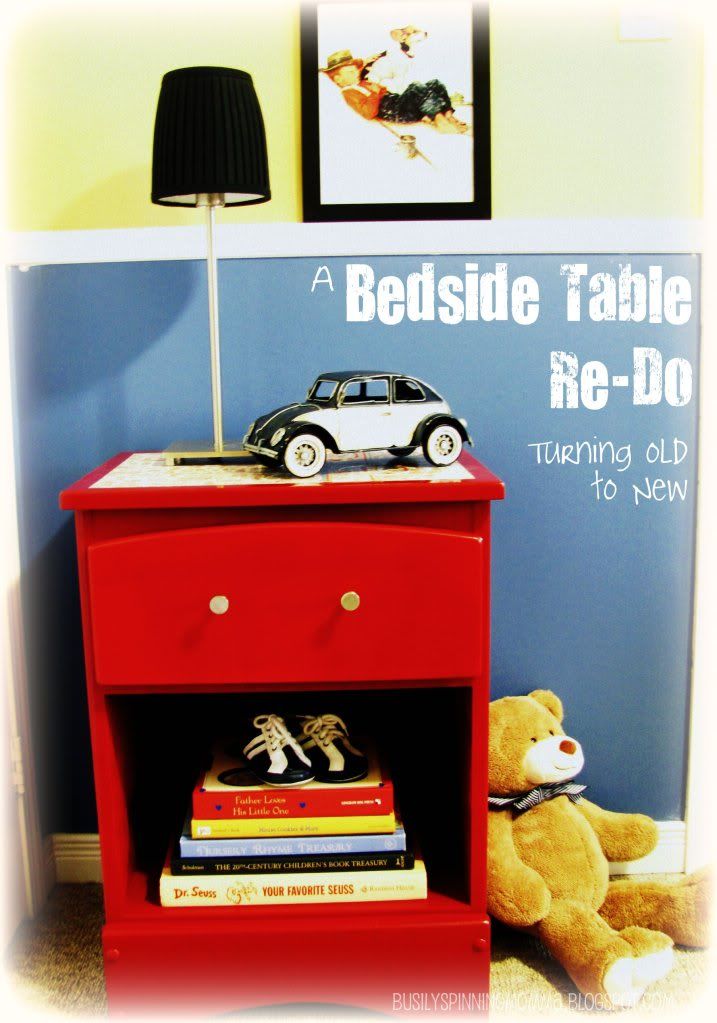
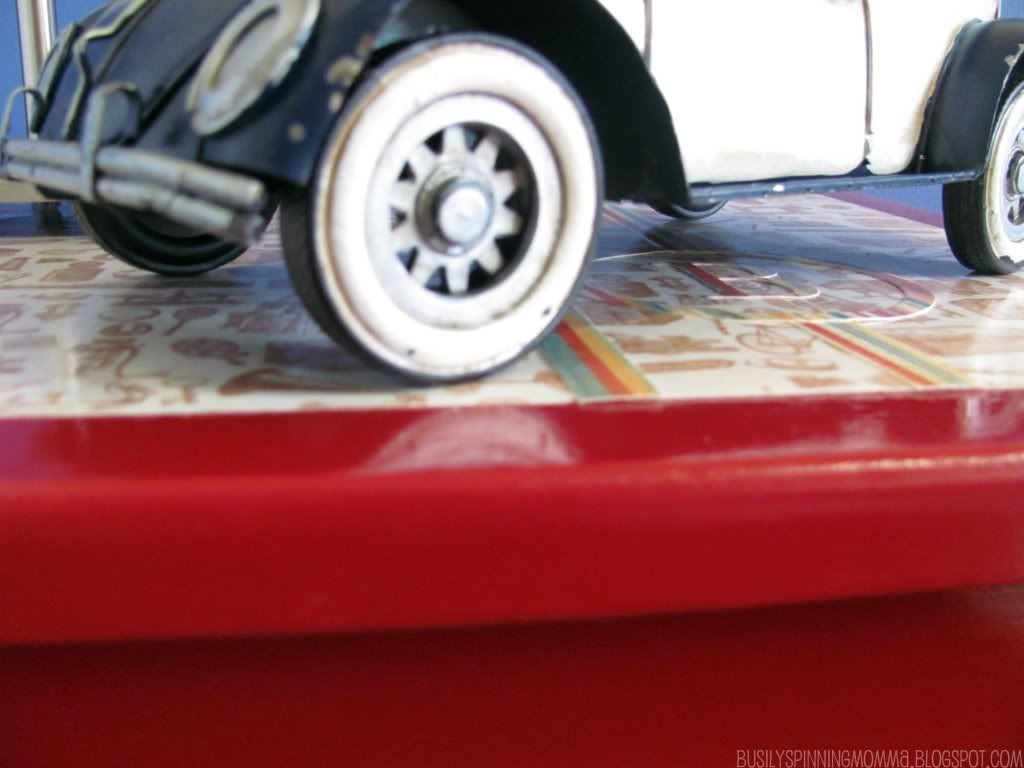
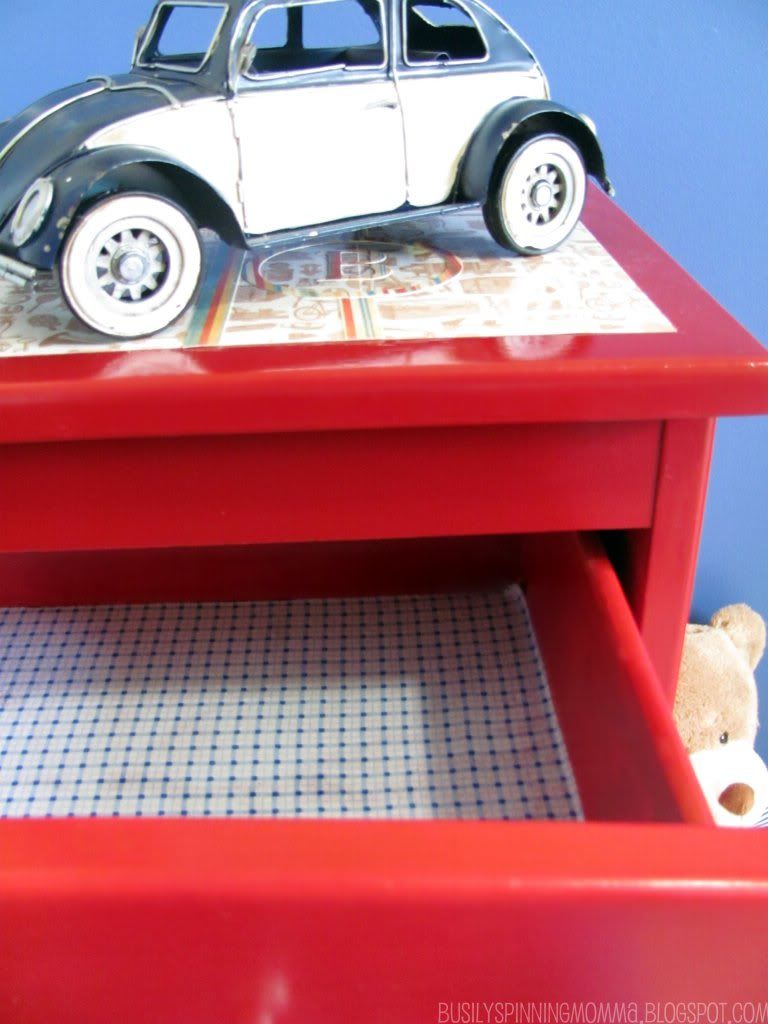
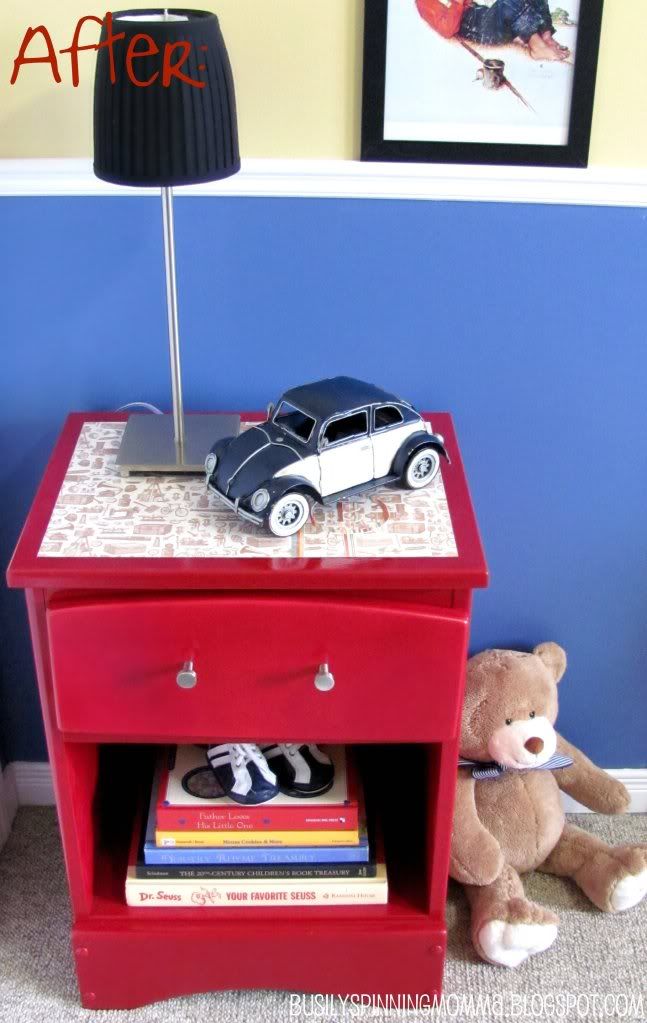
The top was very badly dented and scratched and the varnish sooo thick, I could never sand it off. After all, I sanded the whole thing by hand. So I added some scrapbook paper with Mod Podge and then sprayed a couple of layers of varnish (the same one I used in THIS tutorial) on the top to make it shiny and more durable.
 |
| The letter and paper strip match the curtains EXACTLY, which is why I chose this paper. In hindsight, I might have chosen red instead. |
See how shiny...
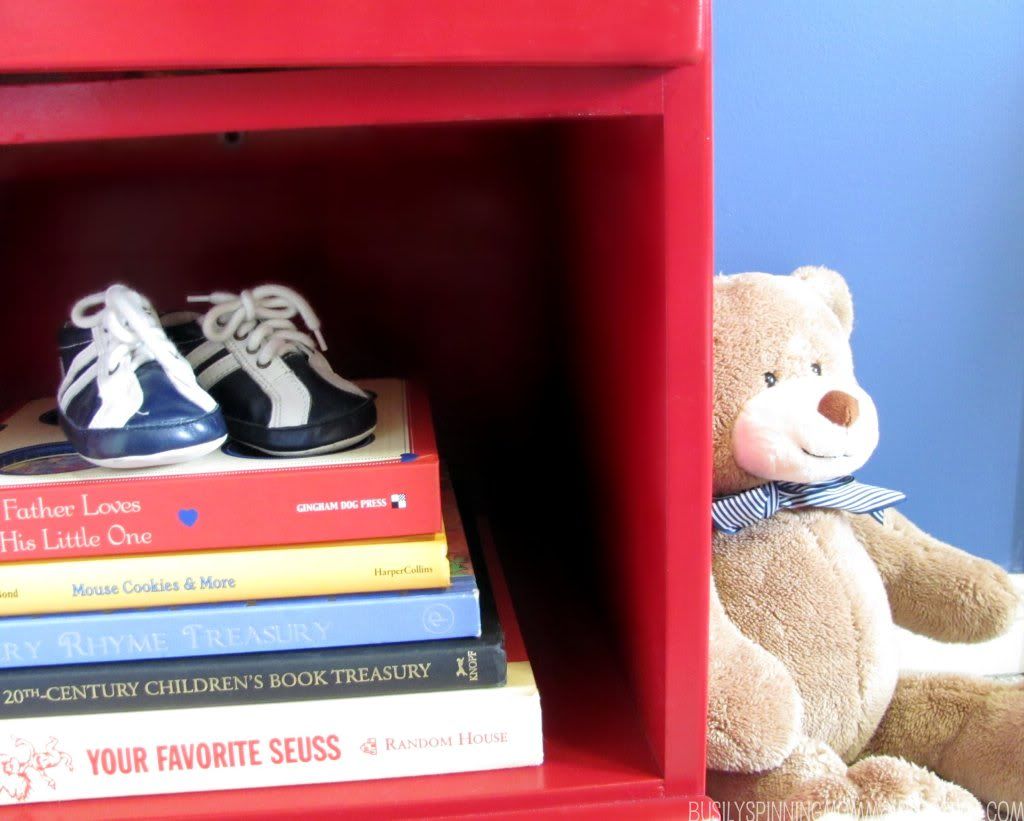
I painted the inside of the drawer and added some flannel to the bottom. I love the colour and pattern of it.
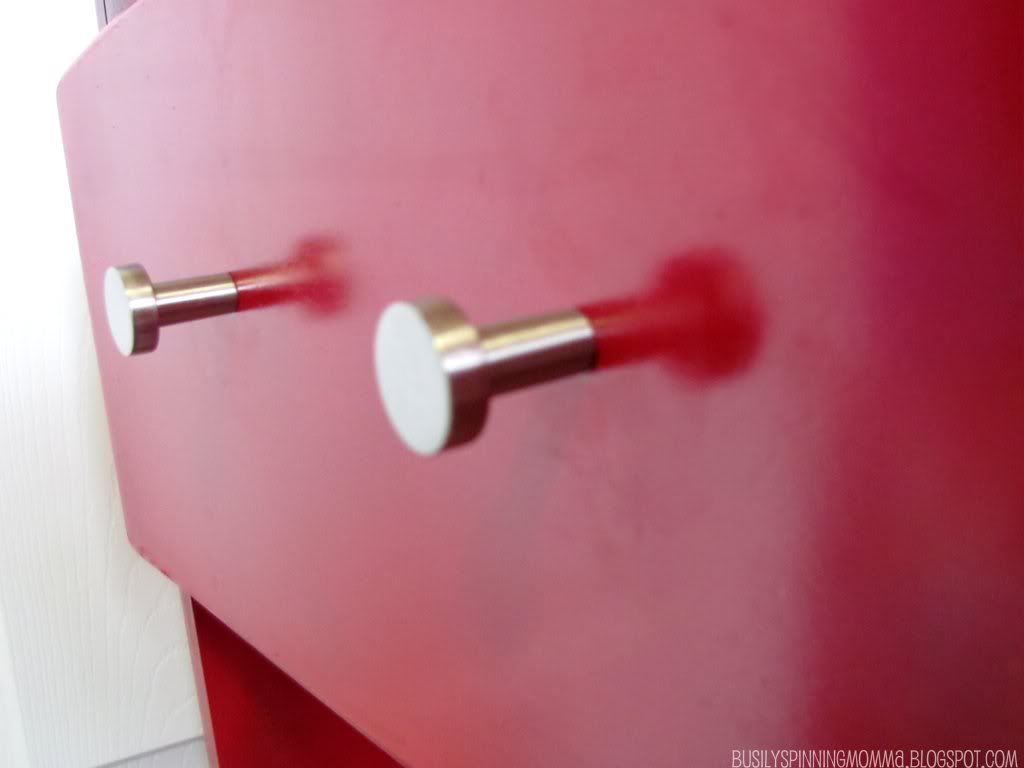
I changed the knobs. I might changed them again, if the right ones comes along. But for now, I kinda like these :)
This bottom part of it, was completely covered in dents and scratches. I was able to fill them with wood filler, and sand it down to a relatively smooth finish.
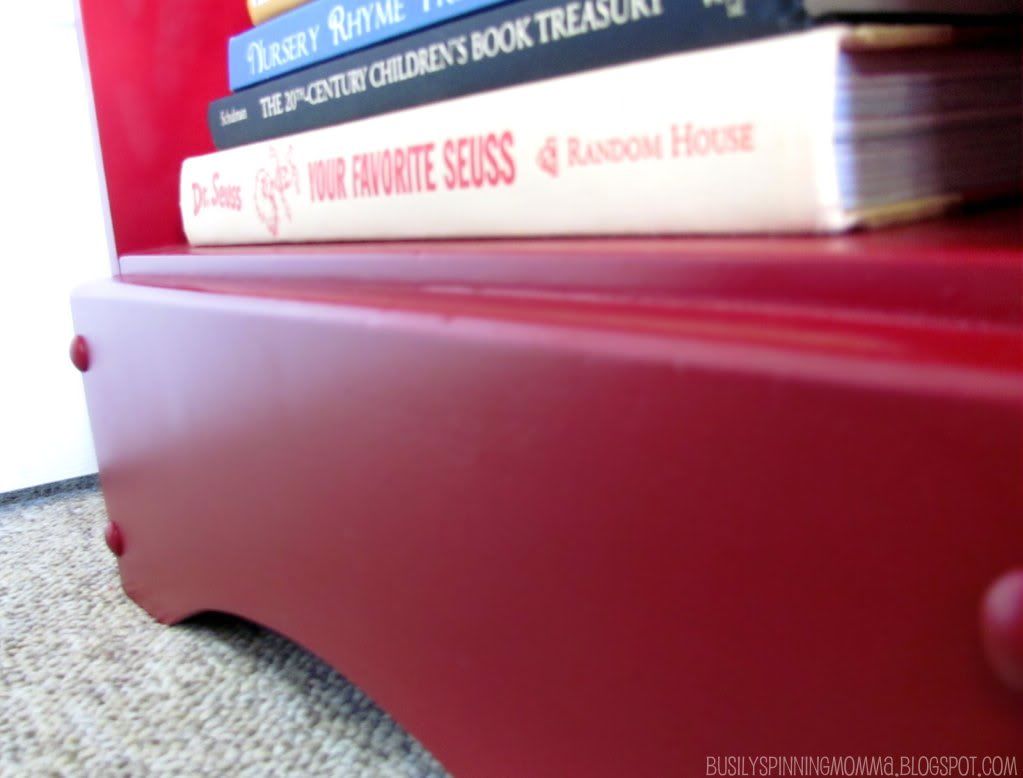 |
| THIS shows the actual colour of the paint. |
I also painted the inside of the bottom shelf. Though it doesn't show in this picture very well.
So, wanna hear something tragic? I totally took a before picture. Along with over 300 pictures of my kiddies. And then my phone went psycho and DELETED.EVERY.SINGLE.PICTURE. Tear.
Anyway, we have the matching dresser, so at the very least you can see what it kinna looked like, the colour and the shape it was in:
 |
| Gotta love thos handles :) |
And then:
What I did was this:
1. Sand that baby till you feel your arms about to fall off. Or use an electric sander if you're fancy ; )
2. Fill the holes with wood filler. I used Elmer's Wood Filler. Dries in no time.

3. After it fully dries, sand it down where you filled it.
4.Prime it. I used Tremclad Spray Paint Primer in gray. It was what I had on hand. Amazing coverage though.
5.Once it dries (sooo important to let it dry completely), paint it. I used Krylon Spray Paint in Cherry Red.

6. Once dry, lightly sand it.
7. Apply any finishing touches you want. For example, the flannel inside the drawer, the scrapbook paper. You could even distress it at this point. Easy Peasy.
P.S...I am not being sponsored for any of these products, they're just pretty darn awesome and thought you'd wanna know. When I started out spray painting, I really appreciated any little insight, so just thought I'd pass some along in case anyone wants it : )
Anyway, there you have it. A new bedside table to finish my boys' room for the cost of two spray paints (I had everything else already), under $15.
Love it. And so does my oldest : ) Which is payment enough for me : )
xoxo, Dorian
LINKING TO:
THESE great parties.

What a great makeover... great pictures too! And under $15? Love it!
ReplyDeleteLove too. Xo
ReplyDeleteNice details deary. :)
ReplyDeleteIndia @ afro-indy.blogspot.com
I'm so sorry you lost your pics. The table looks great.
ReplyDeleteWhat a great transformation! Saw you on linky party now google following. Please pop by, Karima :) www.karimascrafts.com
ReplyDeleteBeautiful update! What a fun color and love the personalized top.
ReplyDeleteLovin this!!!!
ReplyDeletewould love it if you could link this up to my new link party Serenity Saturday over at serenityyou.blogspot.com
xxxx
So nice! Would you come and share this with WorkShop Wednesday. I would love to feature it next week!
ReplyDeleteI love this bedside table!! Love the color and the inside of the drawers too. I am your latest follower. Hope you will stop by and consider following me back.
ReplyDeleteHave a great day!
worldwidemom.blogspot.com
I love it! And you know what I REALLY like? You didn't distress it to death! I must be out of step with the rest of the world, but too much distressing....well.....it distresses me!! (hehe) Seriously, you did a great job!
ReplyDelete