September 5, 2012

He's a SMARTIE

My first and oldest baby started Junior Kindergarten yesterday.
I am beyond excited for him and so happy that he seems to enjoy it so much!
I am really sad for me. I'll miss him so much. He's the life of the party around here.

Anyway, I made a little gift to give to his new teachers, as a Thank You for all the hard work they do from the very start.


Here's close up of the tag I made:


I had seen some other printables with the smarties idea, but they never quite said what I wanted them to. 
So I figured I'd try making my own. It was actually easy and fun! And really adds such a cute touch to the little gift.

Inside are Smarties and a Starbucks gift card. Yum...coffee and chocolate :) The cup is made of glass and double walled for hot/cold.
I'm pretty happy with the results :)

And just in case you like the tag and want to use it, I made a printable.
Now, I'm not sure if this is the way to do it, but I figured this will work.
Just save the picture, copy it into Word, and resize as needed :)


Oh, and his teachers (he's got two) LOVED them! One said "what a SMART way to start the year! WIth Smarties" lol... :)
Hope you're all having a great day and hope your kiddies are enjoying the new school year.

xo, Dorian 

June 21, 2012

Some Sewing, a Serger and a Shoe...

Hello friends,
it's been a while since I've been on my lil' ol' blog.
Summer's officially started (weather wise) and we've been enjoying every bit of it. And I have found that there is less and less time to blog. So, during the summer I will be posting as much (or as little, I suppose) as the weather, the kiddies, the fun allow me to.

So, I've been sewing again! It's a huge deal since I'd fallen into a rut and not sewn a thing since December! Can you imagine?! Wanna know what prompted me to sew again? Well, you see, last month was my birthday and I got a little spending money. And with that spending money I bought this:

Janome Jem Gold Plus Portable Sewing Machine with Light Serging System (LSS) Model 661
The Janome Jem Plus LSS. The LSS stands for Light Serging System. And yes, it's a sewing machine and serger in one! I LOVE it! It makes SUCH a difference in my sewing! If you wanna read more about it, you can go here. (I can also do a review on it if you guys are interested)

Anyway, it got me motivated to sew and I've been busy making shorts out of out-grown pants, coin purses, NapKits ("what's a NapKit?" more on that in Monday's post!), pjs, and shoes!

My sweet baby Benji, is tiny tiny tiny. And I can never find shoes I like, that fit well AND are comfy. SOOO, I made my own. *insert proud grin here* :)
I made them out of an Elvis printed cotton (how cool, right?!) for the outer and a dark brown flannel for the inside:


I am in love with how they turned out! I didn't use a pattern, instead I kinna went with what I saw in my mind and IT WORKED OUT! Yay! Love when that happens :) I made a pattern but not a computerized one. I think I need PhotoShop for that. Rats. Instead I sketched one and I already have a second pair all ready to go!

Oh, and what am I naming these cute little shoesies? The BENJIS, of course!


Well, that's all I have for now. Hope you're all having an excellent day :)
Be back soon!

Dorian

May 9, 2012

Monogrammed Market Tote - Tutorial

Hello friends! 
How are you?
We've been having a slow week around here, as one of my guest posters fell through due to family stuff :( I apologies. I wanted this week to be much more fast paced :( Oh well, such is life.
BUT! I do have one more guest coming soon! ANND, the giveaway is still live! What am I giving away this time, you ask? Oh just over $265 in goodies! Want in? Go here!

Today, I have another easy and fun Mother's day gift idea! It's quick and you can find all of the Plaid's  Martha Stewart paints, and stencil at Michael's. 

You need:
- Canvas tote
- Newspaper (just a sheet)
- Fabric paints (or regular paints mixed with fabric medium)
- Foam Pouncers
-  Stencils (One each in a circular patterned, a letter, and a floral/totally optional)
- Spray adhesive
- Tape
- Fine Point paint bottle


So, start with a canvas bag:
Got mine in a pack of 3 also at Michael's. kinna expensive though at $14 plus tax. But if use your coupons, then it's a sweet deal!

Okay, moving along. Put some newspaper in the bag to avoid leakage to the over side. *just in case*

Spray some adhesive on the back of your stencil. Stick down onto bag (iron your bag flat first). Mix your paint of choice and the fabric medium as directed on the bottle. The fabric medium makes it so you can wash it. Next tape any edge the paint might leak onto.

Pounce the paint right on! (for more pouncing info, go here, to my previous post)
Remove stencil, allow paint to dry. Do all the above steps again, adding the monogram and whatever extra stencils you'd like.
Pounce them in with paint of your choice.

This is what I had when I finished stenciling everything in:

I liked it, but just okay. I didn't like how light the vines were. Bad color choice, Dorian!

So I grab some more paint, medium and my Martha Stewart Fine Tip-Tops in a size 1:

And mixed it all together:

Then I outlined the entire vine and leaves all the way around (please note, this was my first time using the fine tip tops and I had some issues with controlling the amount of paint that came out, so it's not perfect. But it's for my momma, and I know she'll look past my errors and see the love it was made with. I hope. Oy.)


And you have yourself a cute lil' Monogrammed Market Tote!


And lastly, but most important : wait 24 hours, then iron the tote once more, going right over the paint. This sets it, so that you can wash it when needed! How great is that?!

Anyway, it's an easy and fun project that you scan whip up in no time! Ummm...just watch those pesky fine tip tops ;)

Thank you, again, for reading, I hope you're having a great week so far! Almost the end of the giveaway! (with another surprise in store!)

xo, Dorian

May 1, 2012

BIG*HUGE*FUN News!

Wanna know a little secret?
lean in real close....
*it's almost my birthday*
but what fun would it be unless we celebrate?! So, I thought...we should have a Party!
Pinned Image
weheartit
No, not with balloons! A party with guest posters, tutorials, but best of all...gifts. lots and lots of gifts. with an approx. value of , ahem, over $200. But they're not to for me. Oh no ma'am. They're for one of you!

:O
(pssst...that's a shocked face, btw)

You lucky girls.

So, I bet you wanna know what will be the giveaway. 
Well, I'm not telling you! Since my birthday is this Sunday May 6, I will announce the AMAZING giveaway items then, so you're just gonna have to wait :) {but I will say there is jewelry, sewn goodies, custom made designs, shop credits and more!} So be sure to come back Sunday, there will be several ways to win and only one week to enter!


For now, feel free to browse through my sponsors's amazing shops and get to know them a bit better :)


Laura from:

Along For the Ride
"My motto is 'keep it simple.' That's how I approach my work as well. I create jewelry and accessories that are simply delicate, whimsical, and beautiful. Not too big. Not too bold. Just the perfect accessories to highlight the already beautiful you."


Aimee from:


"Helping small business bloom by creating websites, blogs, branding, logo designs and more."


Virginia from:


"Hi!  I'm Virginia, wife, mom, Jesus-follower who can be found at Geeky & Sassy.
Where I write about my not-so-perfect journey with my faith, family, life and home." 


Lani from:
Lani

Lani didn't know what to write so I'm going to gush about her for a bit :) Lani has the CUTEST shop ever. She makes these super adorable Dino Hoodies that every kid LOVES and a grow chart that is off the chart...LOL! Seriously talented lady right here.


Paula from:

"My name is Paula and I run a little shop called Flutterby Kisses.  My business is primarily jewelry but I love accessories too .  At the moment my primary focus is on Glass jewelry and Chainmaille jewelry.  I can admit it.. I am completely addicted to chainmaille!!!  Come by and take a look, I'd love to hear what you think!!"


Chrissy from:
"SimplyCreated carries affordable couture accessories for all ages. Looking for that perfect pop of color to your outfit, we have it, at a price you can afford. We are now specializing in custom wedding accessories ie: hair pieces, pins, shoe clips, and necklaces. We can custom make any item to fit your personality, just convo me on etsy."


Jennifer and Melissa from:
"The Vintage Honey Shop specializes in {cute}!  We make handmade fabric & paper items, ranging from teething & wedding necklaces to diaper cakes & paper magnets! We are two BFF's (Jennifer & Melissa), making quality, handcrafted products just for you!"


Katie from:
"KIS Creationz is a shop that is dedicated to designing handmade high quality headbands and yarn letters for you! Every item can be custom ordered to fit your needs and wants. Have something made for your little one or for yourself!"


Amanda from:
 "Our company is based on the belief that our customers' needs are of the utmost importance. Our entire team is committed to meeting those needs. As a result, a high percentage of our business is from repeat customers and referrals."


Heather from:
"It's A Long Story is a place to share, grow and be inspired. My shop, The Flannel Lamb, is a work in progress that I hope to have up and running by the end of May!"


I hope you're as excited as I am!
xo, Dorian


April 30, 2012

Let's Start Thinking about MOTHER'S DAY...

I recently received an email from the wonderful people at Plaid Crafts asking me if I would be interested in participating in an upcoming Mother's Day crafting event.
OBVIOUSLY, I said yes. 
I received a box of goodies that far exceeded the last one, to make some Momma themed crafts. So after *some* excited jumping around and some squealing like a kid on Christmas morning, I got to playin'! 
I figured I would use this opportunity to create some special gifts for the two special mommas in my life: my Mom and my MIL :)

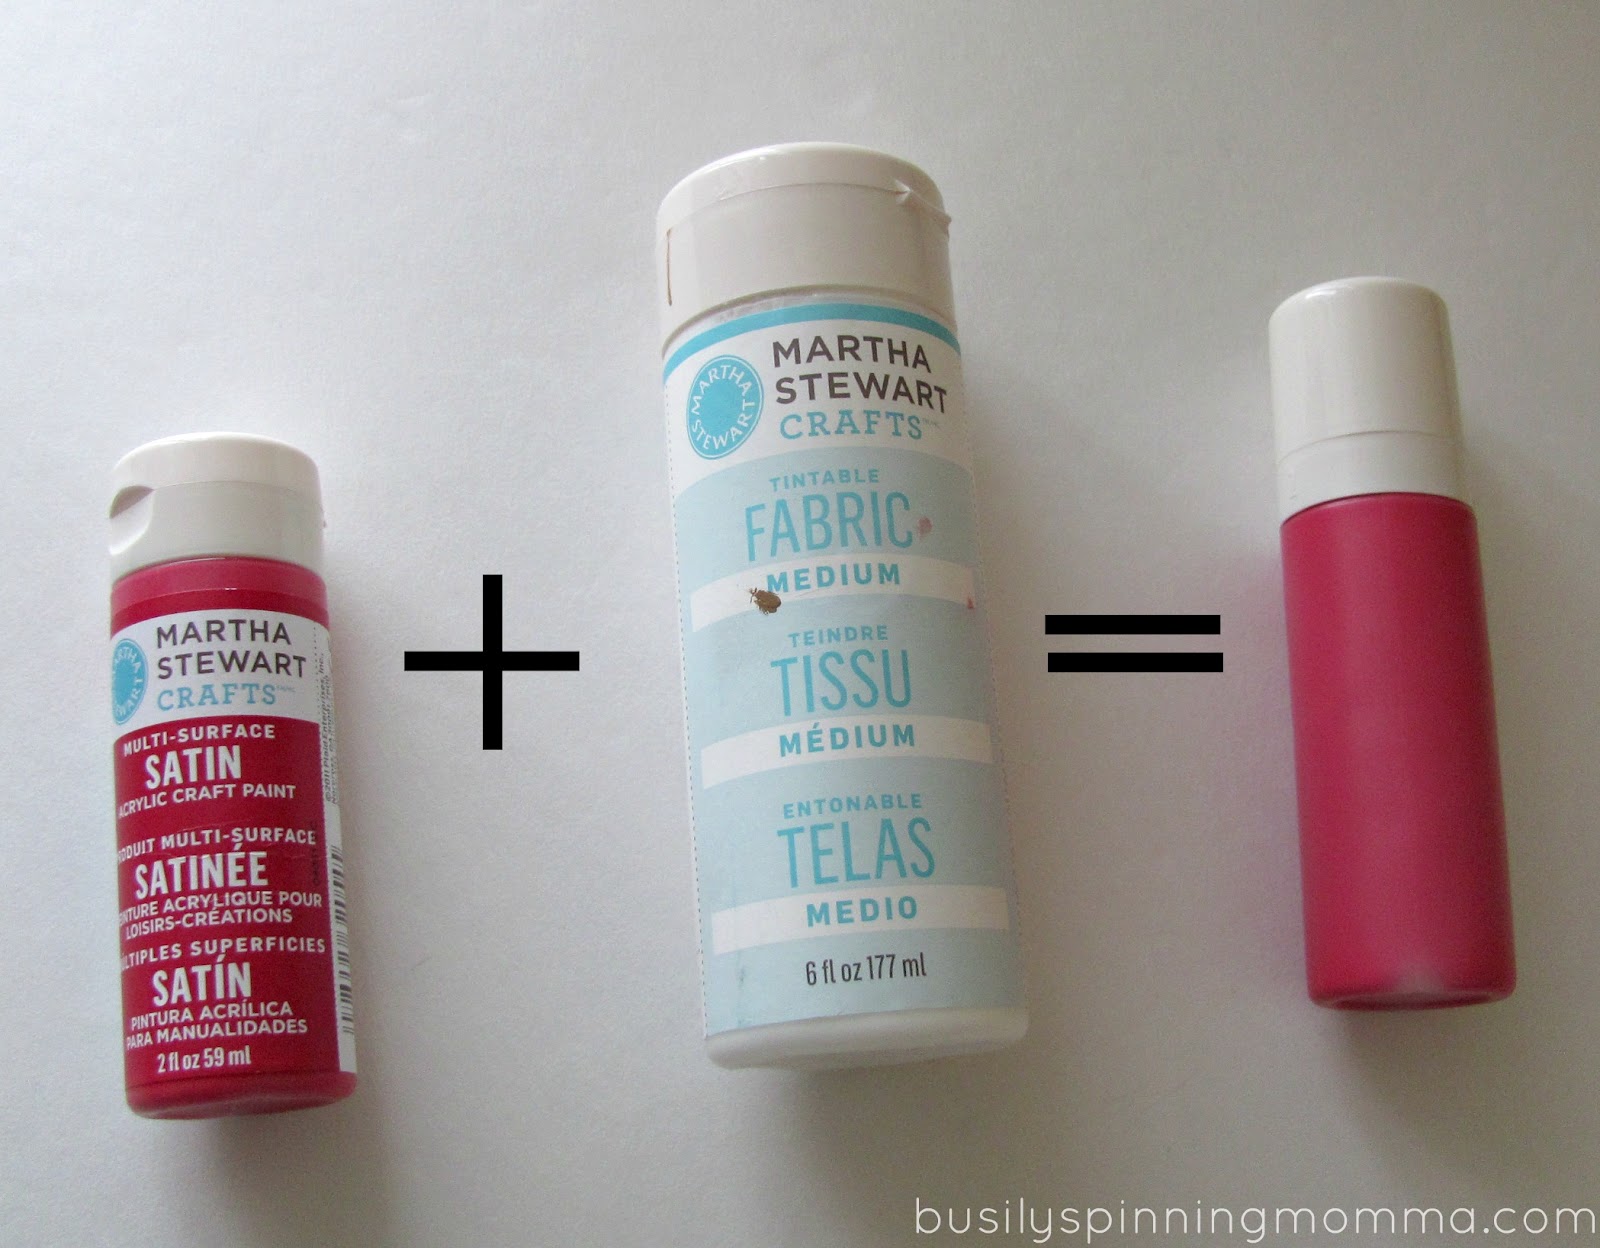
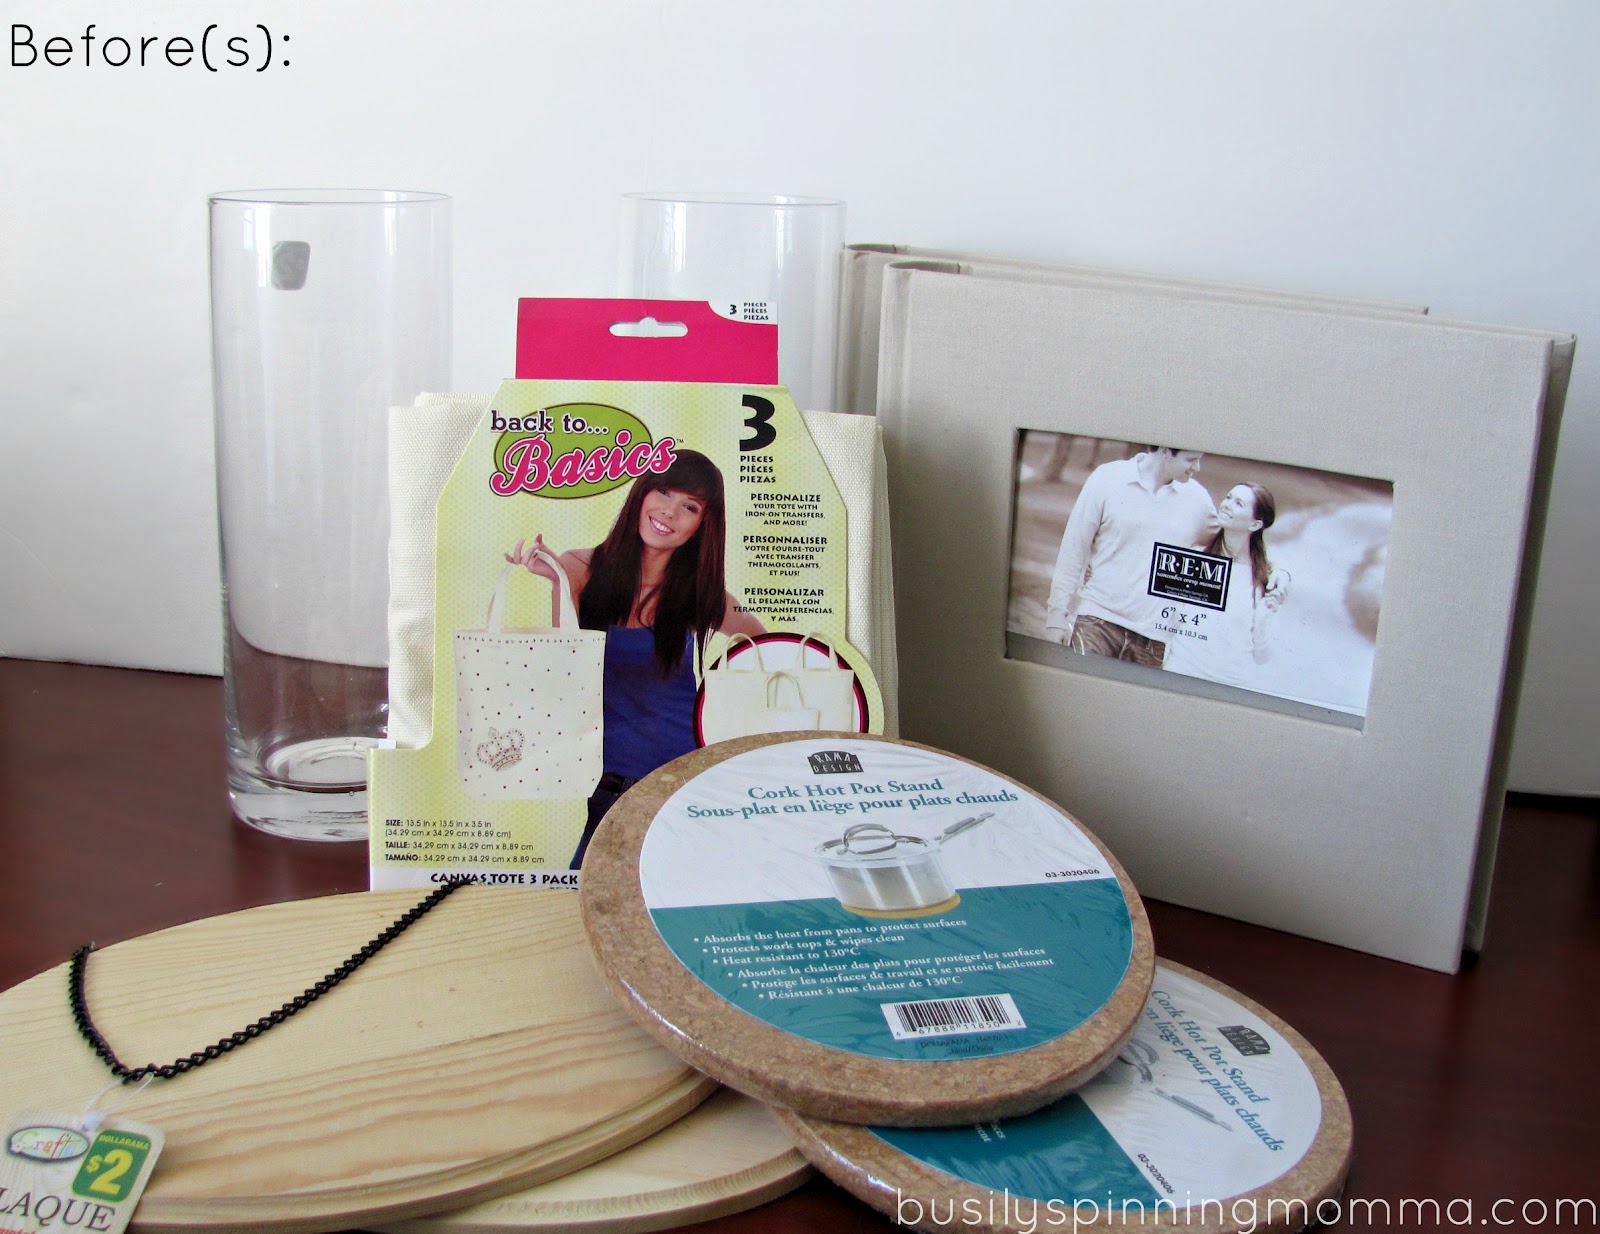
Besides the Martha Stewart supplies Plaid sent me, I went out and bought these
2 Glass Vases from the DS
A pack of 3 canvas totes from Michael's
2 Taupe-y Fabric Photo Albums
2 Wooden Plaques (DS)
2 Trivets and a pack of coasters (not pictured and DS)

Today, I will show you what I did to the albums. And how to do it yourself :)


You will need:

- Martha Stewart Stencil
-Stencil Adhesive
-Paint
-Pouncers ( I used foam)
- Albums

What You Do:

Start of by spraying the Stencil Adhesive on the back of your stencil.
I penciled in where I knew I wanted to but my bird first then positioned my stencil on top.
Because of the stencil adhesive, the stencil doesn't move around because it sticks to your projects. The stencil will still come off easily when you're done. leaving very clean lines :)

Don't forget to tape off the parts of the stencil you do NOT want paint on. Here, I taped over the flowers and the bird's tail. Taping is a VERY important part.

Shake your paint, pour onto tupperware lid paint pallet, and tap your foam pouncer (pictured below) into it. You want to them "tab" some the excess paint off on the lid, so you don't have too much paint on. Too much paint will cause leakage, causing messy lines even WITH adhesive.


Take your pouncer and tab it UP and DOWN onto the stencil. Do NOT swipe it, you need to tap it up and down for a perfect stencil :)


Once you're finished painting, you will have this:
*Please note* You should paint every part that requires say, brown. all at once.
Also, see the arrow? That's where some of my tape is.

Remove stencil carefully:
the circle indicates the penciled in bird feet.

I did two corners in the same stencil just in different directions:

Wait for it to dry.................
(wash your stencil while you wait)

Okay, now take your newly clean stencil, spray some more adhesive on it and line it up with your previously painted lines.
Tape over the painted parts:

Use your pouncer (I used the 3/4 inch one) to paint in your flowers a bright dark pink.
I then used a brush (not pictured, but it's just a regular brush) to paint in the center of the flower stencil, while the stencil was still on:
(you don't have to be super neat or artistic about this part, just dab it on)


Before the paint dries, very carefully remove the stencil:

Do that for both branches and add the bird :)
For the "M" monogram I used the Martha Stewart Fancy Script Stencil Set. It's cardboard (strong one, though) but I still sprayed on the adhesive and it worked great.
And that's it! easy! And sooo cute, right?! I love how whimsical it is :)

I made a second album for my MIL:
Isn't it so elegant and timeless? 

I really hope they both like their customized albums. I plan to fill them with some pictures I had printed of my boys and some of my boys and them. I really hope they love it.

Anyway, I have 2-3 more stenciling projects coming in the next two weeks, so if you haven't tried stenciling before, you can try it now! It always intimidated me before, I don't know why though, it's fun and Plaid makes it easy with they're products. Anyway, if you wanna try, go for it! There' is plenty of variety :)
"See" you soon!
xo, Dorian

P.S:
Don't forget to check out my Big Birthday Bash! We've got a HUGE giveaway coming up on Sunday, should be fun!


*I feel obligated to say that I am part of a group of bloggers who works with Plaid on special campaigns. I received no monetary compensation for this post, just the material to craft with (BETTER!). All opinions expressed are my own. I wouldn't blog it, if I didn't love it :)

LINKED:
To these parties!

April 24, 2012

DIY Gift Ideas for Teenage Girls

A sweet friend of mine asked me what were some great DIY gift ideas for teenage girls. And I, being the blogger I am, decided to write a WHOLE post about it :)
This week has been incredibly busy, and I am working on what I feel are A MILLION projects (a fashion tute for you guys and several Mother's day gift idea with tutes), so this post is a nice break :)

Every young girl LOVES jewelry. Especially unique, one of a kind stuff.

This particular teenager like to travel, so what's better than a journal to chronicle her adventures?
{FYI, even the teen who doesn't travel would use this, what with all the high school drama and all ;)}

Pinned Image
The Creative Place

Funky Scarf:
Fringe5

Customized Tote:
It's no-sew! You can get the package of 3 totes for $16 at Michael's. Use the 40% off coupon and that's seriously a great deal!
Pinned Image
Under the Sycamore

Customized tee:
Find a favorite poem or verse, use a bleach pen and voila!
Pinned Image
Sweet Verbena via UCreate

A camera strap cover:
(this one is no-sew either!)

A Girl and A Glue Gun

I didn't include any sewed gifts, so everyone can find inspiration!
Thank you to my friends over at the BSM facebook page, who gave me some awesome ideas! You ladies rock :)
Hope you enjoyed the small roundup!

xo, Dorian

April 12, 2012

An Anthro Knock Off- TUTORIAL

Hello again, friends! I finally, FINALLY made a tutorial for you all!
It's a fairly simple one too, no sewing needed. 

This is what we'll be making today:


Yes, it's a knock off. I saw this beauty on the Anthro website last fall:
Pinned Image
It's called the Modular Necklace, and retailed for $88 CDN. Say what?! $88 for some embroidery thread and a safety pin is a bit extreme, I think, so I figured I could make it myself :) And, I think my version is pretty dead on, no?

Ready to start? 
Read on, then!

These are called "Cord End Crimps" and I bought them off Etsy, $3.99 for a bag pf 100.

I bought my thread at Wal-Mart. Though I saw some GORGEOUS colors at Michael's.
And, I chose these colors to keep it as close to the original as possible. I added a red (I didn't see what color the original had, in one part because it was hidden) and gray (not pictured, but keep reading). Also the Sienna color beside the pic, did NOT go on the charm, but rather near the neck clasp.

You will also need:
- silver chain
-clasps (for the back of the necklace)
- 4 jump rings
- jewelry pliers

Annnnd, GO!


 1. take your looped thread and 
2. squeeze and twist (in the middle) it as thin as it'll go. 
3. Put the twisted part into the crimp, and use your fingers to squeeze it shut, as much as you can.
4. Use your pliers to squeeze shut a bit more BUT NOT ALL THE WAY!
5. This is what it looks like from the back
6. cut off excess from onto the crimp, in a rounded cut.
7. Pull the bottom thread down to bring the cut part into the very top of the crimp. SQUEEZE IT COMPLETELY CLOSED. (use pliers)
8. Trim and even out thread. 
9. Do that 10 times.

Moving right along...
For my gray thread:

 The original has 10 little thread crimps on the safety pin. For my size pin, 10 felt crowded, so I did 9 :)


Now, add your jump rings into the circle-y part and the entry part of the safety pin, as shown below:


Add you chain, and your clasp, with jump rings again:
Add the extra "dangle-y"

And you're done!

I love the way it looks, it's very different and simple, but so colorful and cheery!
And really, what's better than thread and a safety necklace for a fabric lover like myself?!


SO, I'm not going to say it was super easy, because it wasn't. BUT it wasn't hard, either. Just the putting the thread in the crimps is kinna a pain, but once you've done two, it gets a LOT easier!
I hope you give it a try! It's really not so bad, I promise. 

And, as always, if you have any questions, or if I lost you without detailed instructions for the jump ring and added the necklace part, please don't hesitate to ask! I will answer them best I can! Just make sure you leave an email I can reply to, otherwise, I'll reply on this post :)

You can find more tutorials, here.
Thank you for reading!

xo, Dorian


Related Posts Plugin for WordPress, Blogger...