Hi all! I fixed the lil' problem I was having. YAY! And now, I have another fun lil' tutorial for you.
Here it is, the...

This is pretty straight forward and not that complicated. It's super cheap and easy to make and customizable, what can get better than that?
YOU WILL NEED:
- A fat quarter (1/4 yard) of fabric
- "Invisible" thread
- Needle
- Scissors
- Glue gun
- A tiny bit of contrasting fabric
- Chain (or ribbon or whatever you want to use to make the necklace with)
HERE WE GO!
First, take your fabric (find a fabric you LOVE...like this gorgeous cotton, I swoon every time I look at it!) and cut out three strips of 2 inches each, cut about 9 inches long (or as long as you want, really).
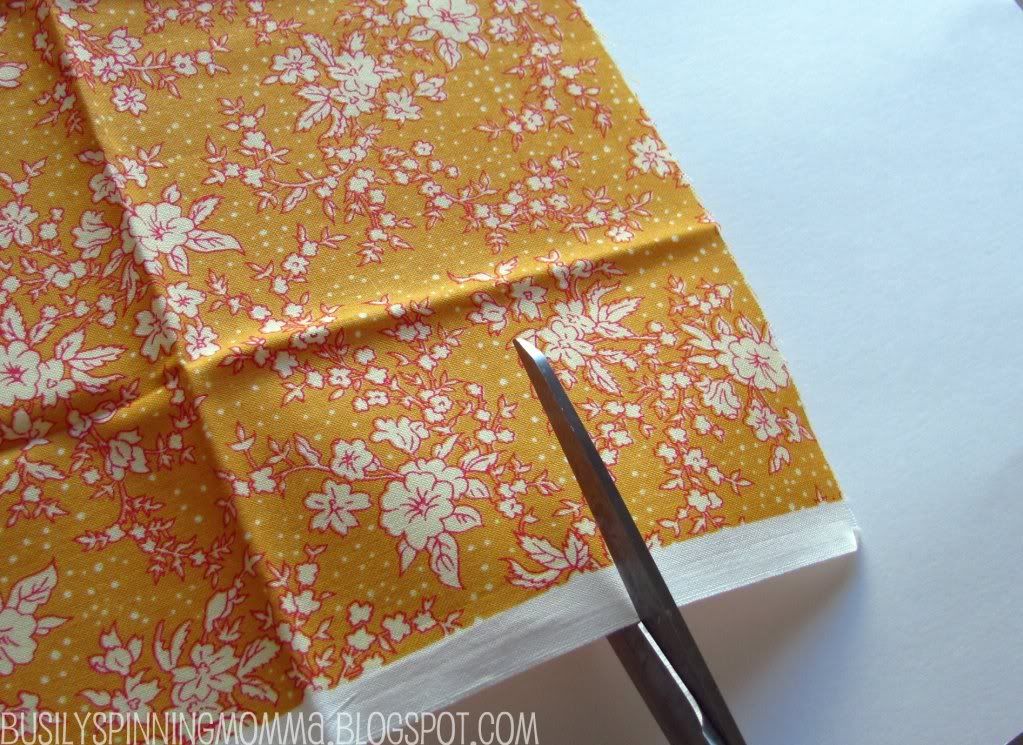
After cutting, fray the strip a little

You should have this:

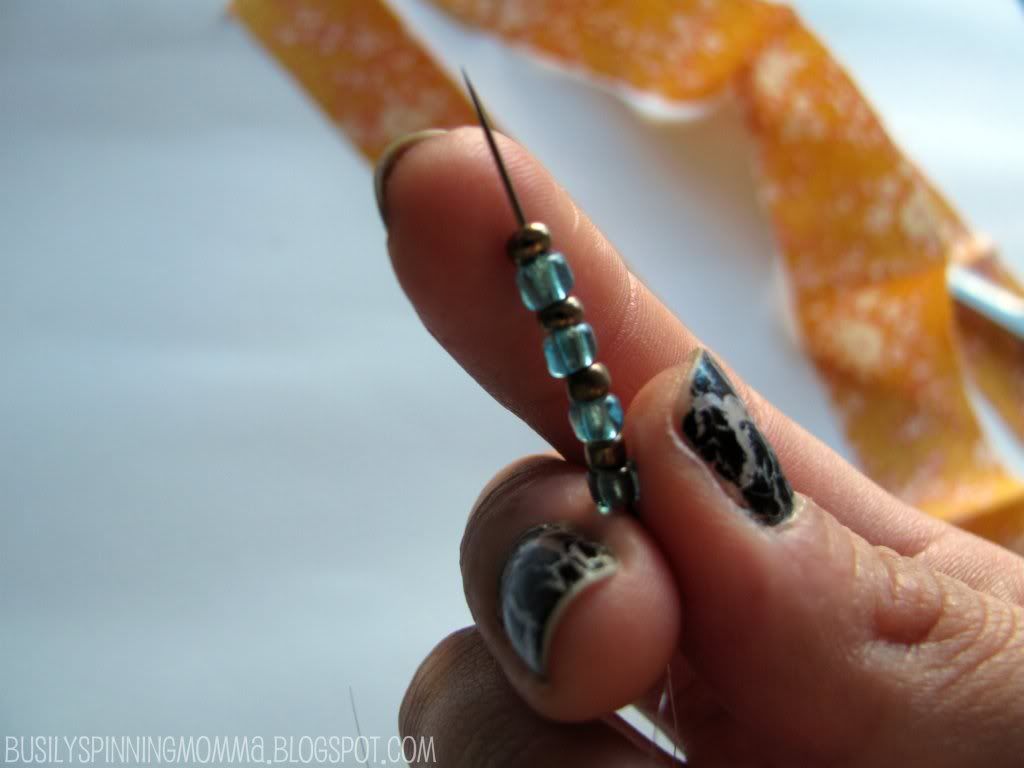
Grab your "invisible" thread and beads of your choice

Use a needle to bead them onto the thread
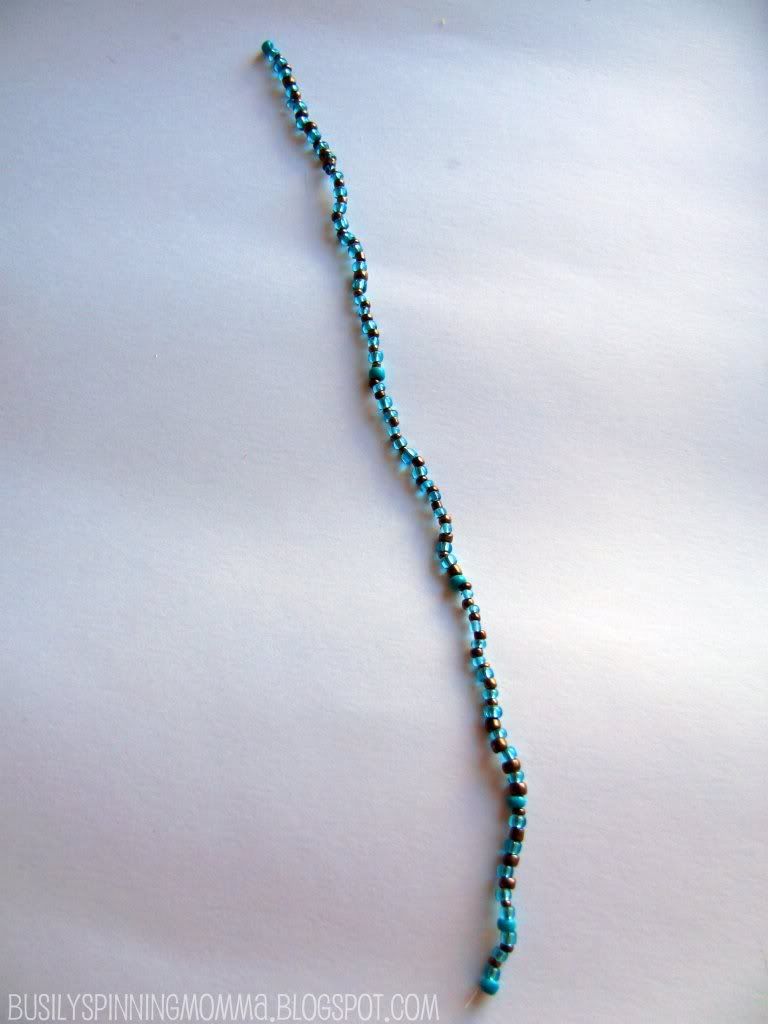
This measured 8 inches. It was a bit smaller that the strips themselves.
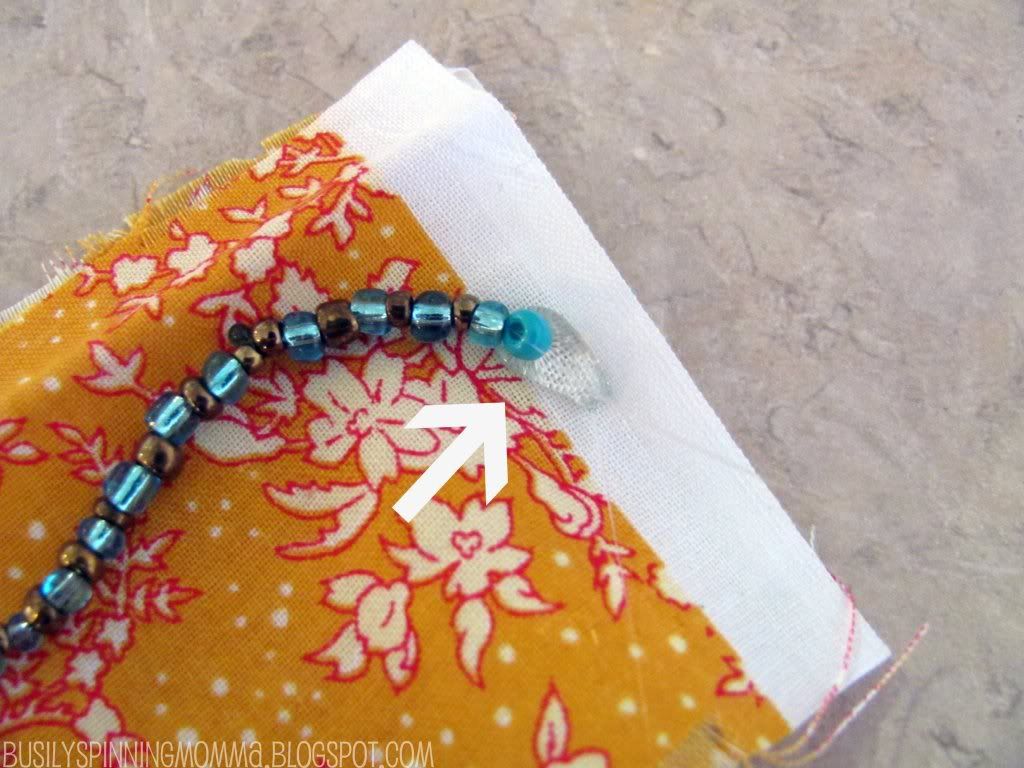
Glue your fabric strips together and glue in your beads as well.
(I glued my beads in the middle of the fabric, not on top, since I didn't want them to be too obvious)
Okay, I totally messed up this next step, so to avoid time consuming fixer-uppers, follow my advice and GLUE THE CHAIN IN NOW! You need to glue closed the fabric so you can braid easier, so take your chain (or ribbon...) and glue into the center of your folds. See picture.
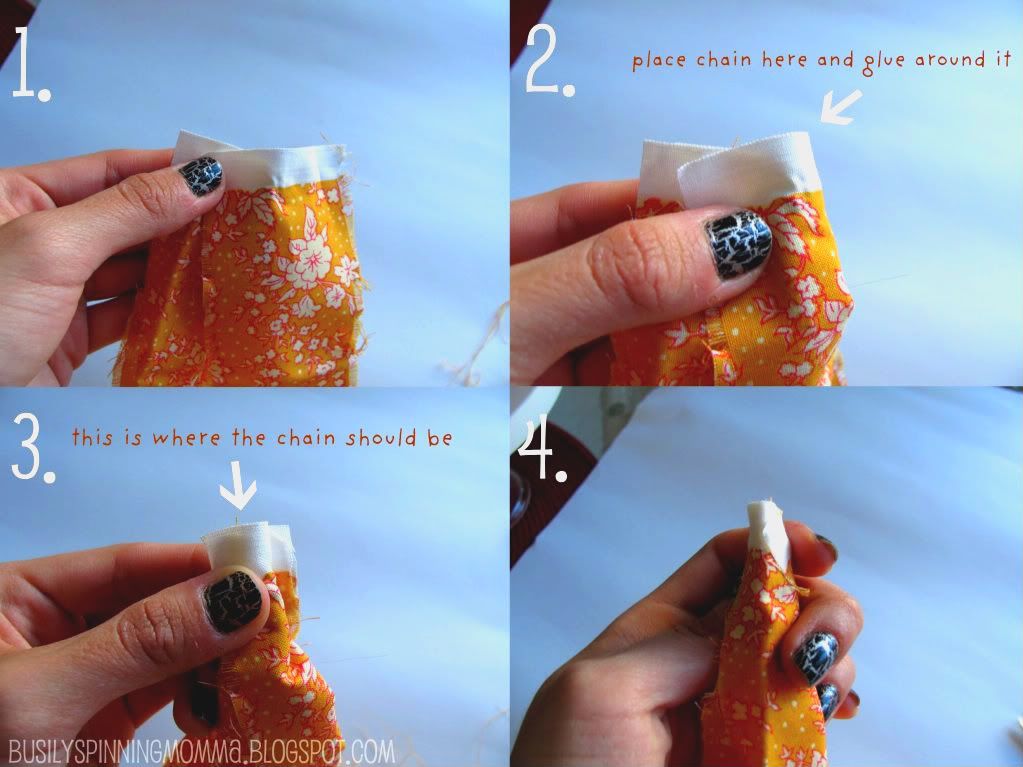 |
| Honestly, this was a PAIN to fix....that's what I get for rushing! |
Once you've done that, braid until you come to the end of beaded chain. Glue beads down onto top fabric strip, like so..
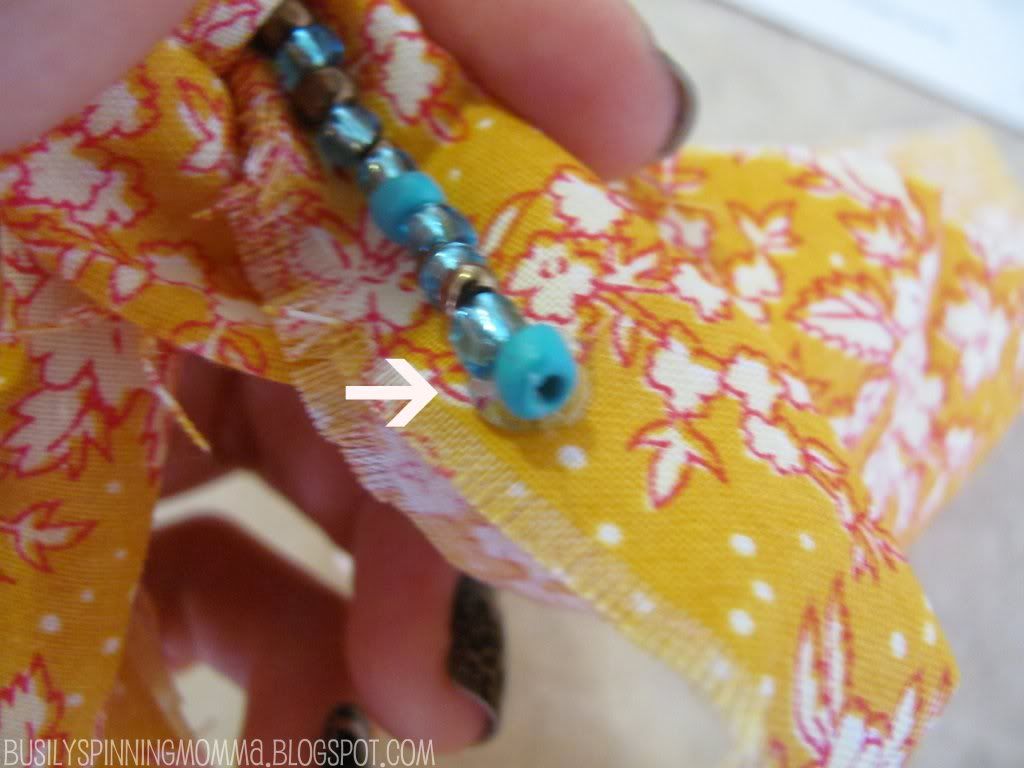
Then braid once more ON TOP of beads and glue...
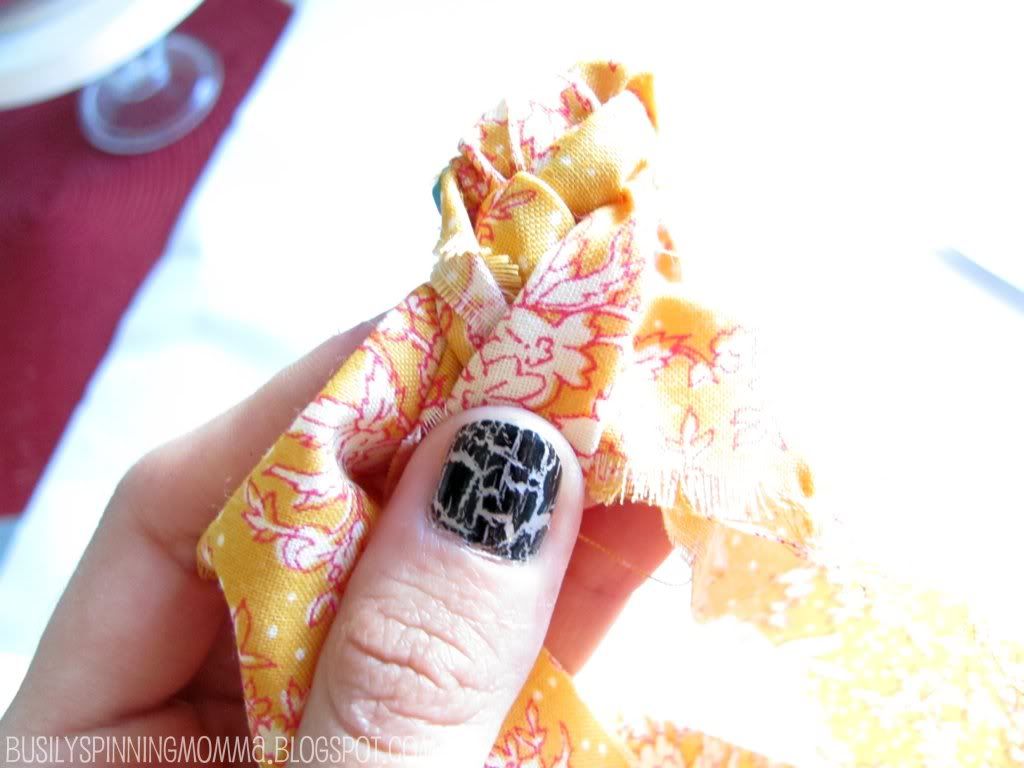
And follow the next five steps, adding the other end of the chain to it (which, because of my previous error I also didn't do this time and had to fix it as well...urg!) But add the chain at Step 3, um kay?
 |
| Don't you just love my nail polish? It's called " Crackle Glaze" by OPI and all you do is apply it and it crackles for you! Comes in white too. AND you can wear ANY colour underneath it! Woo-hoo! |
Then put it on and admire how great it looks!

I wanted to add wooden bead beside the turquoise ends but, even though I had the beads, I didn't have what I need to attach them with! I wanted to make this project with things I had on hand, so I let it go.
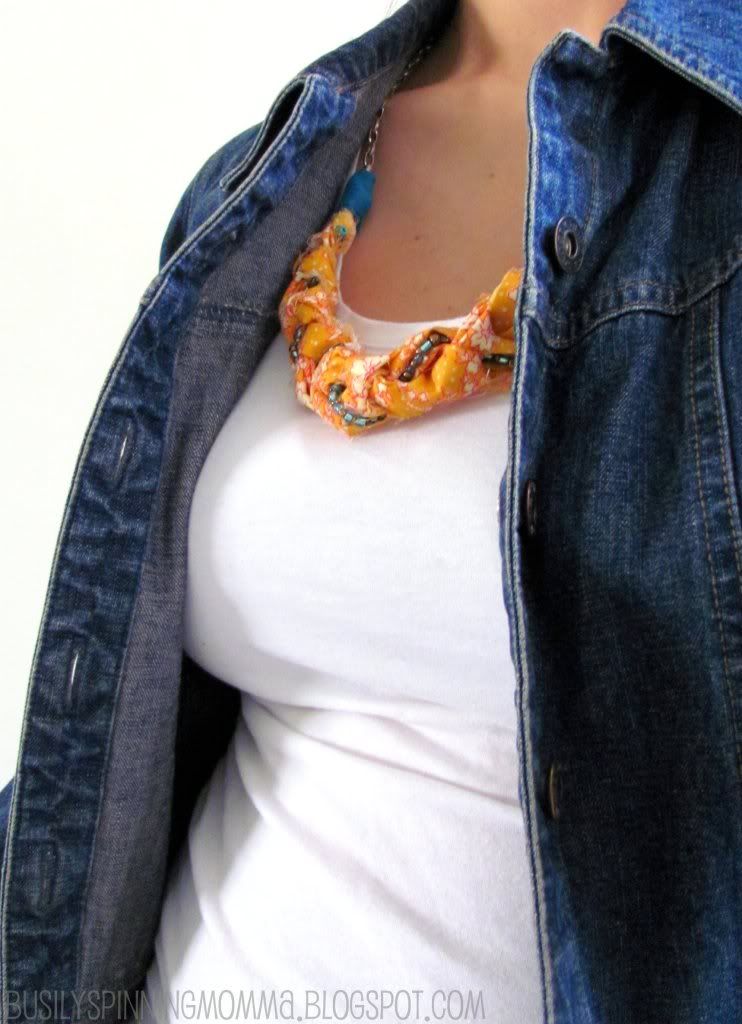
Personally, I love how it looks with a jean jacket!
This jean jacket, btw, used to be a jean dress (or trench, I guess), but after a little refashioning I got a new jacket and skirt! Skirt tutorial to follow.

How I love the pop of colour! I plan to add a felt rosette(s) as soon as I get my hands on coordinating felt!
Anyway, I hope you liked it and weren't terribly bored by it. It's not something new, but I thought I'd share it with you!
Have fun and hopefully this cheery, colourful necklace is soon followed by cheery, warm days!
Tutorial can be found in the "Tutorials" tab under:
LINKED TO:

this is adorable! Love the added beadwork :)
ReplyDeletethis is so cute!! love the tutorial :)
ReplyDeleteWhat a great idea! Great tutorial; I'm going to have to try this soon :)
ReplyDeletethis is awesome,love it
ReplyDelete