>>>This is a tutorial originally done for my old blog, it was posted October 24, 2010, so it's not new. I hope you don't mind? It seemed to be a favourite over that way and since the ol' blog is gone, finito, forgotten, I thought I'd share it with you all. (This is when I wish I was Texan so I can drawl "y'all" and not feel like a poser! HA!) <<<
Today, we will be inspired by J Crew. Imitation is the greatest form of flattery, no?
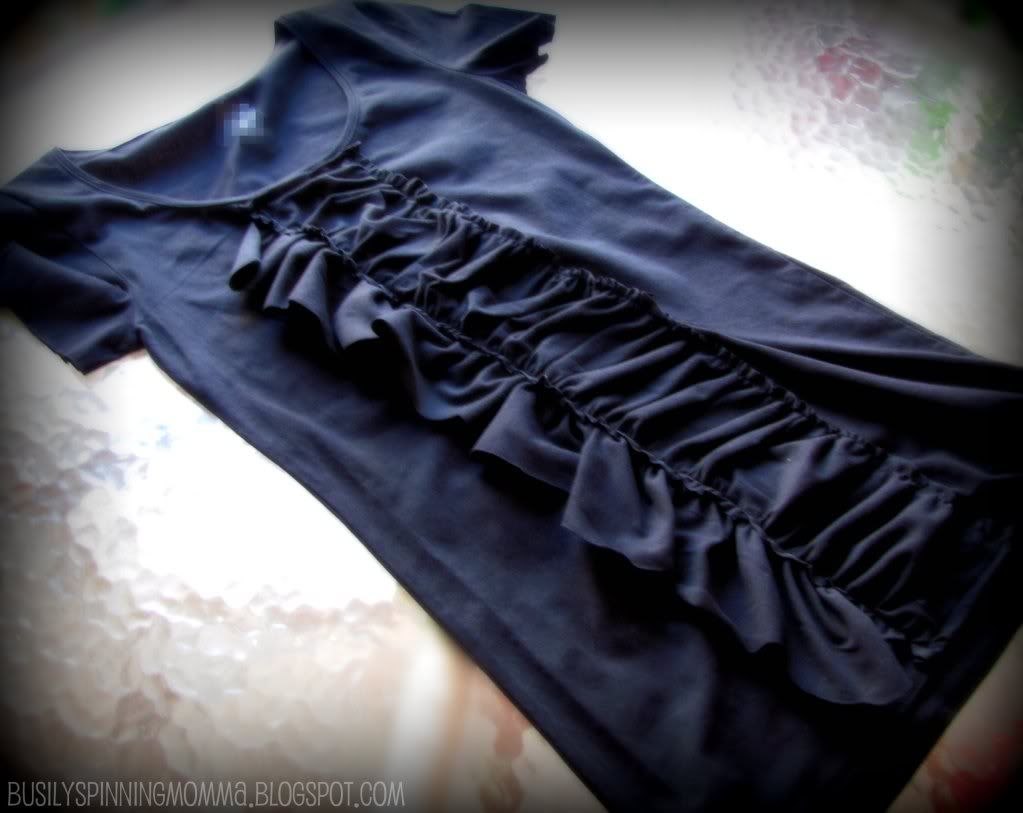
This is what we'll be making today...

J Crew...originally $42.50!
Made by me...for $7.00...how's that for saving!?
YOU WILL NEED:
-A long sleeve tee, preferably a jersey cotton so you don't have to do seams and not worry about fraying (you can get a new one, but this would work well with an old on you're bored of or is stained down the front)
-sewing machine
-thread :)
-pins
-scissors
Easy ,so far right?
HERE WE GO!
Take your long sleeve tee...and cut off the sleeves to create shorter sleeves.
(NOTE* I chose to cut of the sleeves because I don't mind making it short sleeved, but if you wanted to keep 'em, you'll be needing a second shirt of the same fabric to cut up for the ruffle part)

Next, you cut of the sleeve hem...this part here in the picture...

Once you've done that, fold it in half...

Then, you're going to cut the sides edges so that you'll have a even shaped rectangle...
Here, I've already cut the opposite edge...

Open them up and you should have this...

Okay, now RIGHT SIDES together and pin at ONE end...do that to both...
You'll now have this...

Sew along the edge where you've placed your pins...

You should now have this....remove pins...

And open, laying flat, seam part down...

Set your machine at the longest stitch length...

And sew all the way UP both edges of one strip and up only ONE side for the other...
.NOTE* For the one where you'll only sew one side...sew it on the RIGHT edge...WRONG SIDE DOWN.
Leave a piece of long thread when you finish sewing up sides.
 |
| **See, here...the one on the right has been sewn up both edge (kinda like a hem) making it all bumpy like that. The one on the left, has been sewn up only ONE side...allowing the other side to lay flat** |
Now, you're going to gather it. You take the long thread you left and pull on the one that gives more easily. Just play around with it till you get it...it doesn't have to be neat.

It should be bunching up, like so....

This is the one with the one sewn side...I cut scallops into the side NOT SEWN...to make it prettier....
gather this one like I just mentioned...

This is what you should end up with...
The left one looks like a "C" shape because, we only gathered one side :)

Place on shirt...you can tell that right now it's too short...

Fold the top part of the ruffled piece...attach with pins...and then begin CAREFULLY and SLOWLY...pulling at the fabric to make loosen the gathering, therefore, creating a longer piece of fabric...

When you've done that...it should look like this...make sure you arrange the gathers to look the way you want them, so there are no gaps or flat parts...

Pin on the right side of gathered fabric....like so...

Take your other piece of fabric (the "C" shaped one), lay it on shirt....hmm...too small...but you know what to do!
Slowly and careful, loosen gather and stretch out the fabric to make it longer...

When it is the size of the front of the tee, slide it UNDER your un-pinned side...the gathered section should be what's showing...making it look like the ruffles are part of the whole thing...

See how it's UNDER the main piece?

Pin it down being careful to get the ruffled piece properly aligned with the top gathered piece.
Only the top piece should show. So hide that ruffle gather underneath!

SEW! Start at top corner...

Then turn and go all the way down...basically sewing a rectangle to secure the gathered piece and ruffles all at once. Finish at the corner you started...securing well. Snip. Cut. Done.

It should look like this when done...

See how pretty?

And that, my dears...is it! A brand new shirt in 30 mins! That is, if you can get away from the kids that long!
I know, the pictures are terrible! The shirt is black, not gray! But it was done at 3am and moonlight? Not so great for pictures!
And this is a picture of me (looking like a total and complete doofus) wearing a similar tee that I made for my SIL. I had just had a baby, so don't mind the extra junk in my trunk! At least the tee's very forgiving!

I'd love to hear what you think...enjoy!
As usual, you can find this tutorial under the "Tutorials" Tab at the top, under:


LINKED TO:
THESE great parties!
Love it! Thanks for the tutorial; at least one shirt in my giveaway pile is going to be getting new life!
ReplyDeleteum, what junk in the trunk?? :)
ReplyDeleteI love this idea; I have a huge pile of giveaway stuff on my closet floor, I'm going to see if anything works for this!
Another awesome tutorial; thank you!
gin
That looks amazing! I really, really, REALLY love it! I have a long-sleeved tee with a big stain right in the center and I've been wondering how to give it a makeover and hide that stain . . . this would work perfectly! Thank you!
ReplyDeleteRachel @ Maybe Matilda
PS, I'm a new follower! Thanks for the inspiration--I'll send you a pic if my shirt comes out as cute as yours :-)
ReplyDeleteI absolutely love it!!! Amazing job :)
ReplyDeleteBecky
justbeckause.blogspot.com
Cute! I'll have to make one of those when my baby comes out and this preggo tummy goes away.
ReplyDeleteGreat shirt and great tutorial!
ReplyDeletestopping by from Trendy Treehouse!
ReplyDeletePlease stop by and say hi
xoxo
bB
www.itsybitsybrianna.wordpress.com
Lovely! And I like yours better than the pricey one!
ReplyDeleteSuper cute!! I love me some J.Crew! Thanks for sharing :-)
ReplyDeleteWay cool! We are going to put it on our list to try.
ReplyDeleteI featured this top on my blog today: http://www.maybematilda.com/2011/04/five-favorites.html
ReplyDeleteCheck it out! I just love this shirt!
I am a new follower. Cute tee. COme link up.
ReplyDeletehttp://makinitdomestic.blogspot.com
I always love trying a new way to restyle a plain tee. This looks like a perfect "do it in a day" project. I'm all about immediate satisfaction! Big thanks for sharing this idea!
ReplyDeletemynoodlecaboodle.blogspot.com
checking your blog out from Tatertots and Jello's weekend wrap up. love this tutorial. i'll be trying it out soon.
ReplyDeletei'm your newest follower!
Come visit me, if you'd like.
I really love this! I am a sucker for ruffles! I scheduled a feature of this for this afternoon!
ReplyDeleteDenise
Extreme Personal Measures
This is awesome, I came over from Maybe Matilda. My sewing skills are not that great yet but I am bookmarking this for when I feel my confident! goobyecityhellosuburbs
ReplyDeleteGreat job mama!! Thanks for linking up!
ReplyDeleteI followed a link from maybematilda.com to your awesome t-shirt tutorial and gave it a whirl tonight. my, oh my, this is the coolest thing I've ever sewn. Truly. I'll take a pic tomorrow in the daylight. Thank you, thank you!
ReplyDeletehttp://twhitney.blogspot.com/2011/04/t-shirt-refashion.html Here's a link to my shirt. Thanks again for your great tutorial! Have a good weekend.
ReplyDeleteSick a55 shirt, love it!!
ReplyDeletei'm always excited about t-shirt projects!!! thanks for sharing!!!! :)
ReplyDeleteQuestion! How is this wearing now that you've had it a while? How to do you wash it to make it last?
ReplyDeletemade this today, Tip Junkie linked it. I love how it turned out. And to think I was just going to throw that long-sleeved shirt away! Thanks for being creative and for sharing!
ReplyDeleteJust came across this on Pinterest! I love this!!
ReplyDeleteAwesome job I just love it. Thanks for sharing :)
ReplyDeleteI LOVE it!! I have to many t-shirts that I was going to toss, now I will recycle!!
ReplyDeleteHi!
ReplyDeleteThis is Alicia Joy from http://ajoyworthhaving.blogspot.com. I just wanted to let you know that I've nominated you to receive the Most Inspiring Blogger Award! You can read all about it here:
http://ajoyworthhaving.blogspot.com/2013/04/very-inspiring-blogger-award.html
Thanks for being so inspiring, and keep up the good work!
Alicia Joy