Hi ladies!
Today I have a TUTORIAL for you lovelies! Yay!
Today I have a TUTORIAL for you lovelies! Yay!
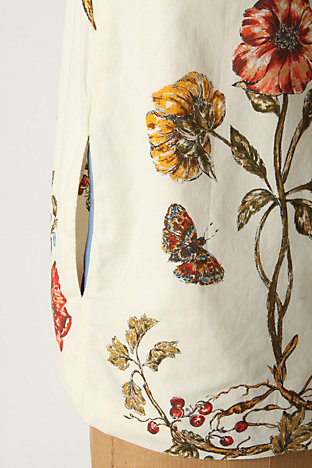
I recently saw this shirt on Anthropologie:
 |
| via |
Supa-dupa cute, but price-y. What I really loved about it was the shape (forgiving!) and that it has tiny little pockets:
 |
| via |
CUTE!
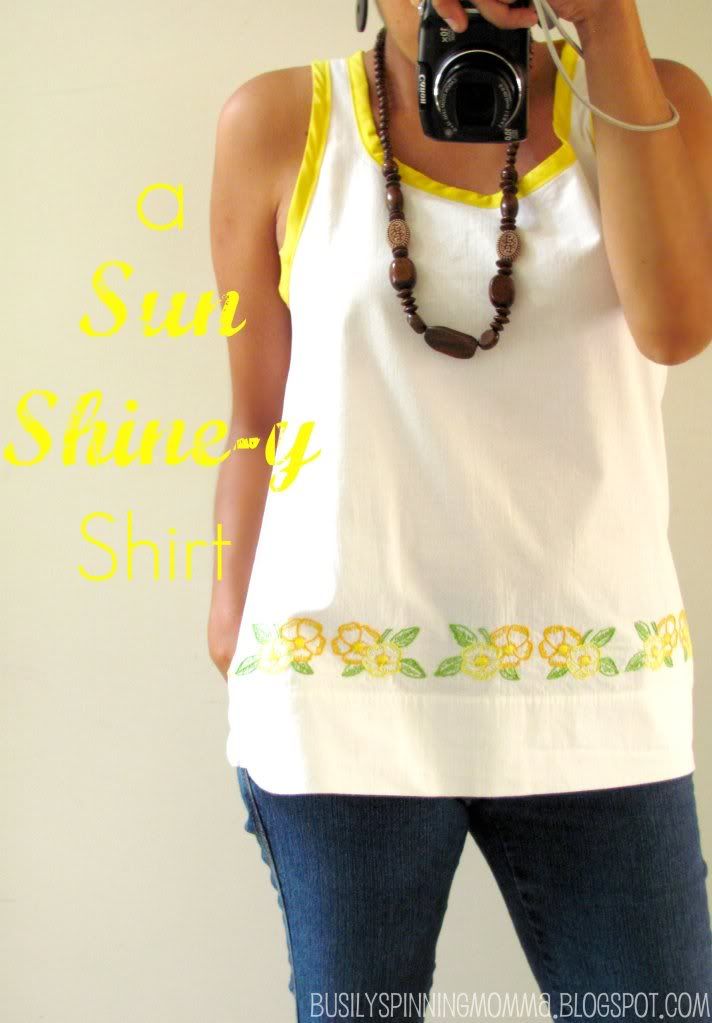
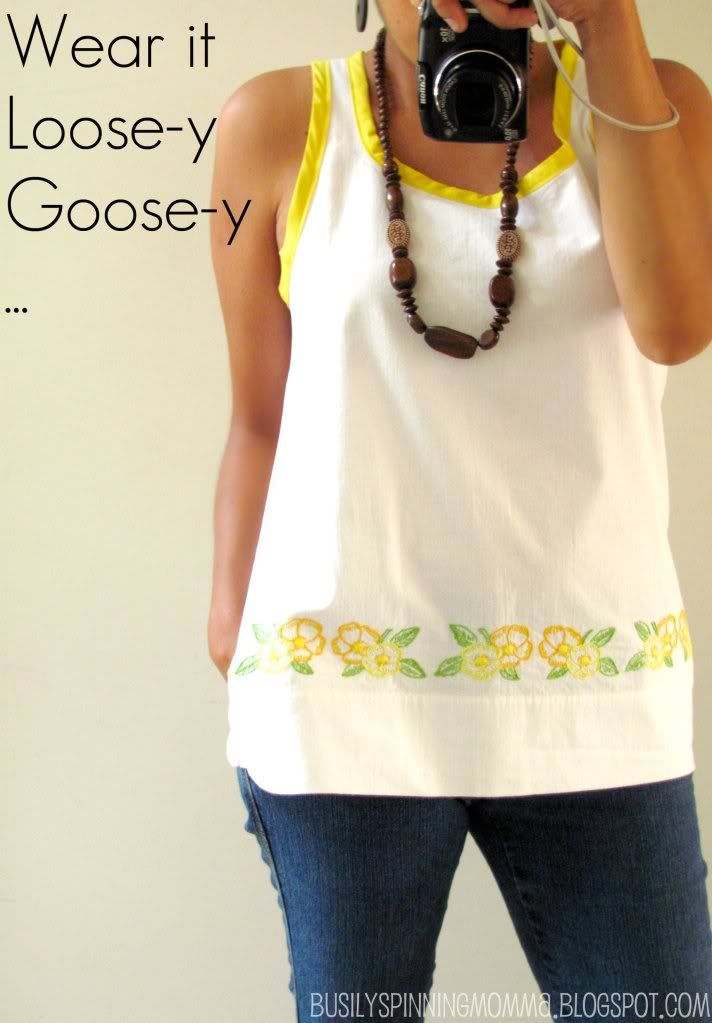
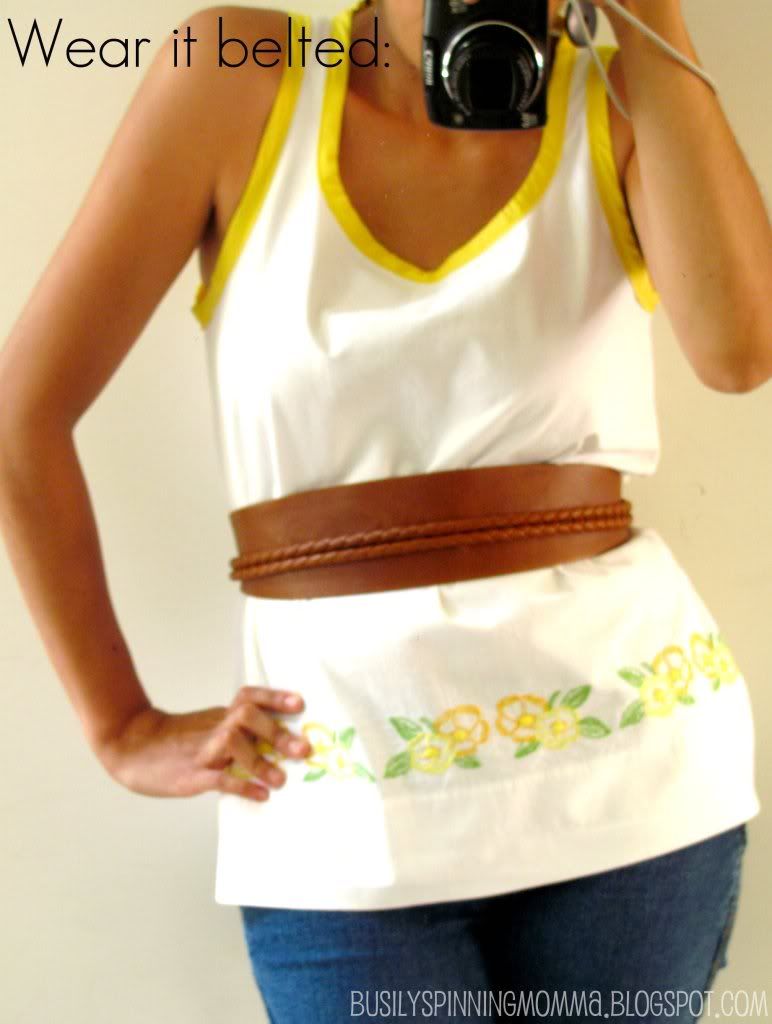
But I thought that it would look cute in a different fabric (and really, I'm trying to use what I have rather than spend on new stuff!!), so I cam up with this:
Want one for yourself?
Great, cuz I made a tute!!!
HERE'S WHAT YOU'LL NEED:
-about 2 yards of fabric. I'm guessing so just in case get 3 yards :)
- bias tape in coordinating colour
-sewing machine
-water soluble fabric pen
READY? HERE WE GO!
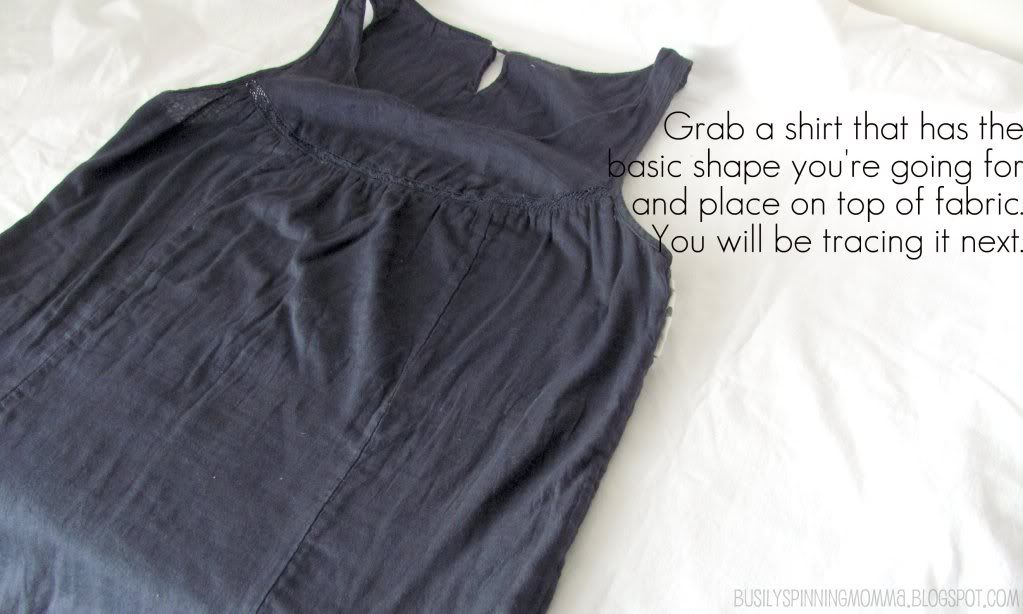
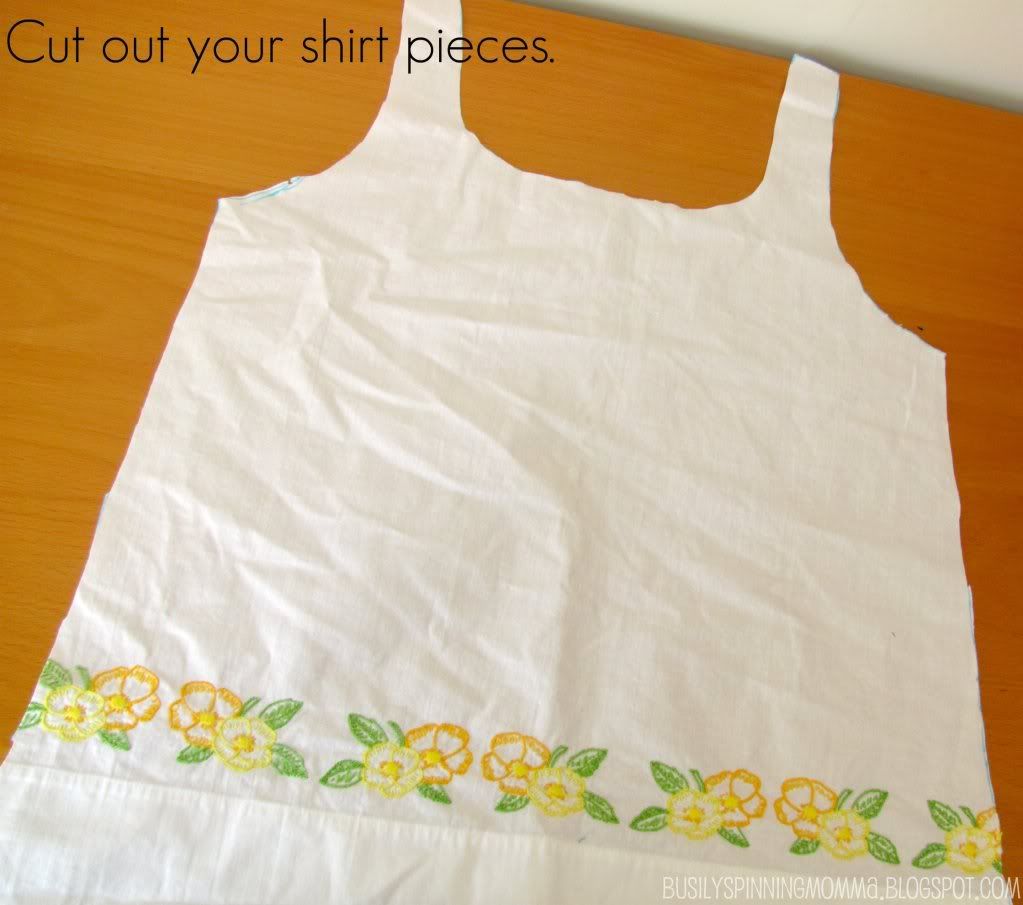
I was lucky enough to have a shirt in a similar shape: (this photo looks funny, because I had to lower the exposure so you could see the white fabric)
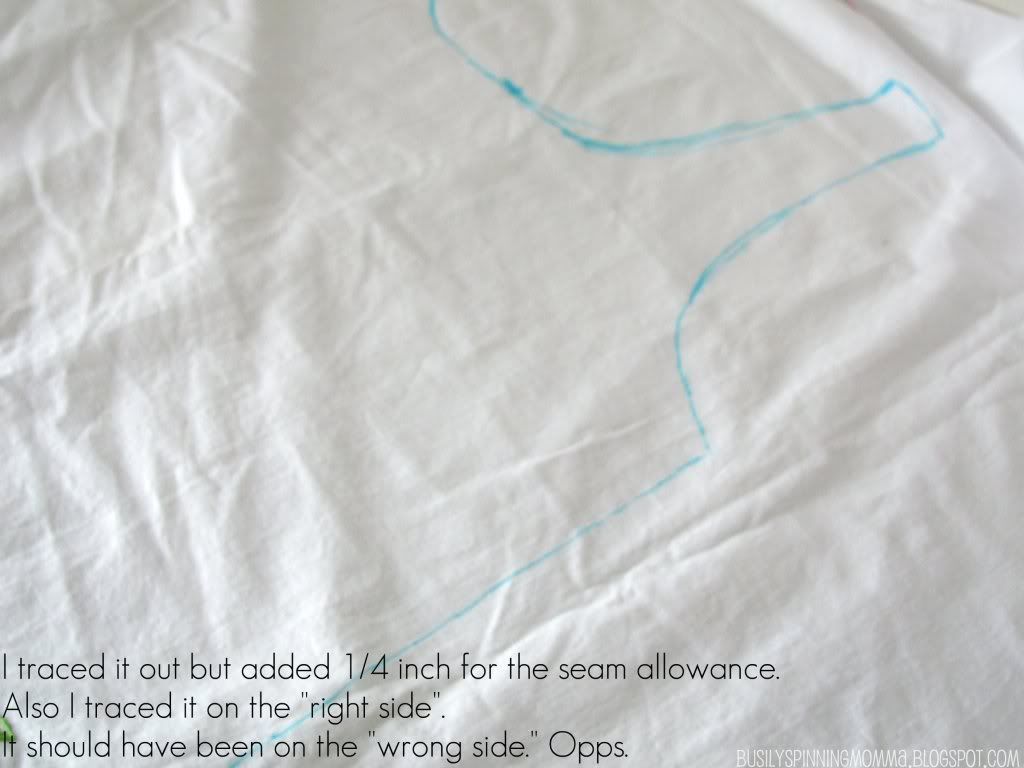
If you are confused about 1/4 inch or seam allowance, feel free to email me!
Set that aside.
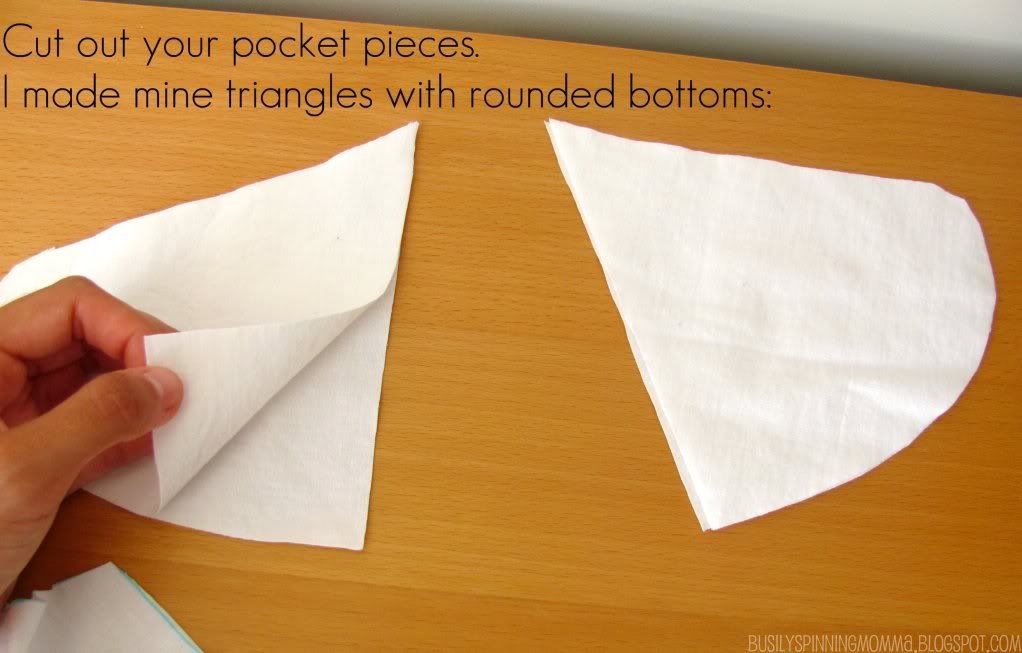
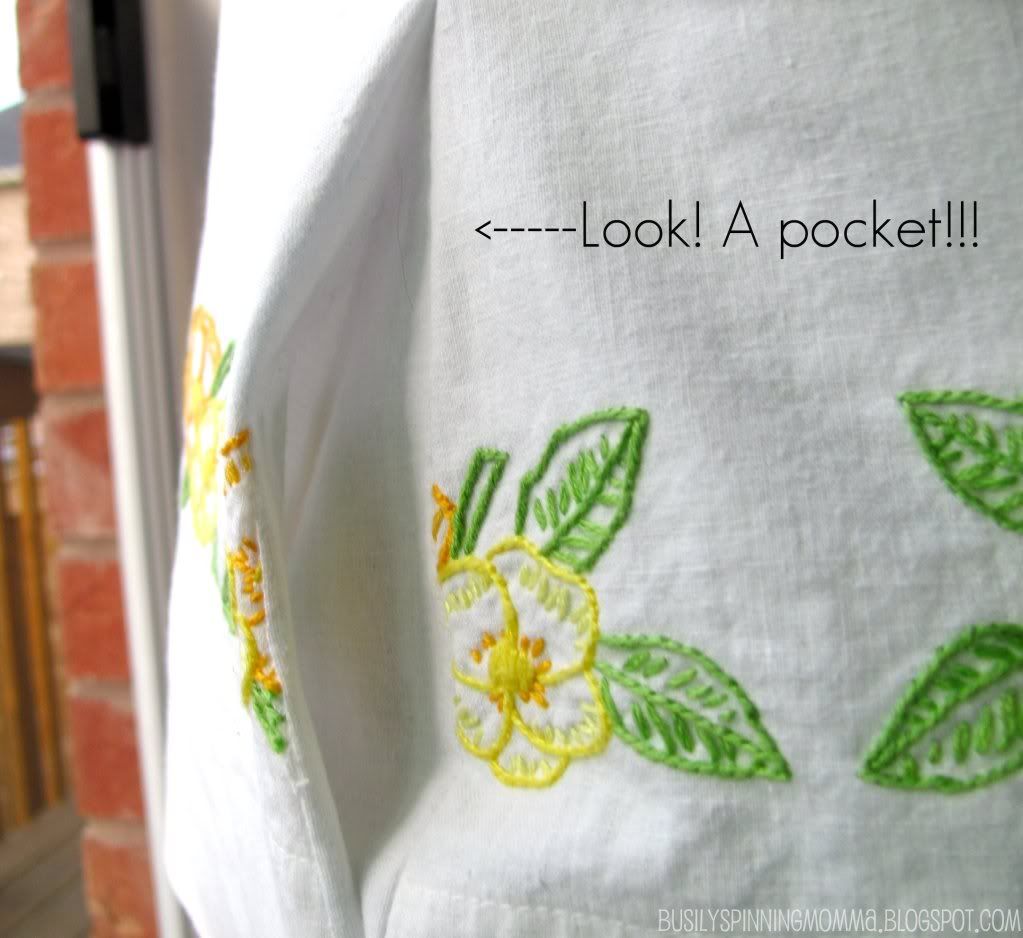
Now for the pockets!
You should have two of each set....four pocket piece in total.
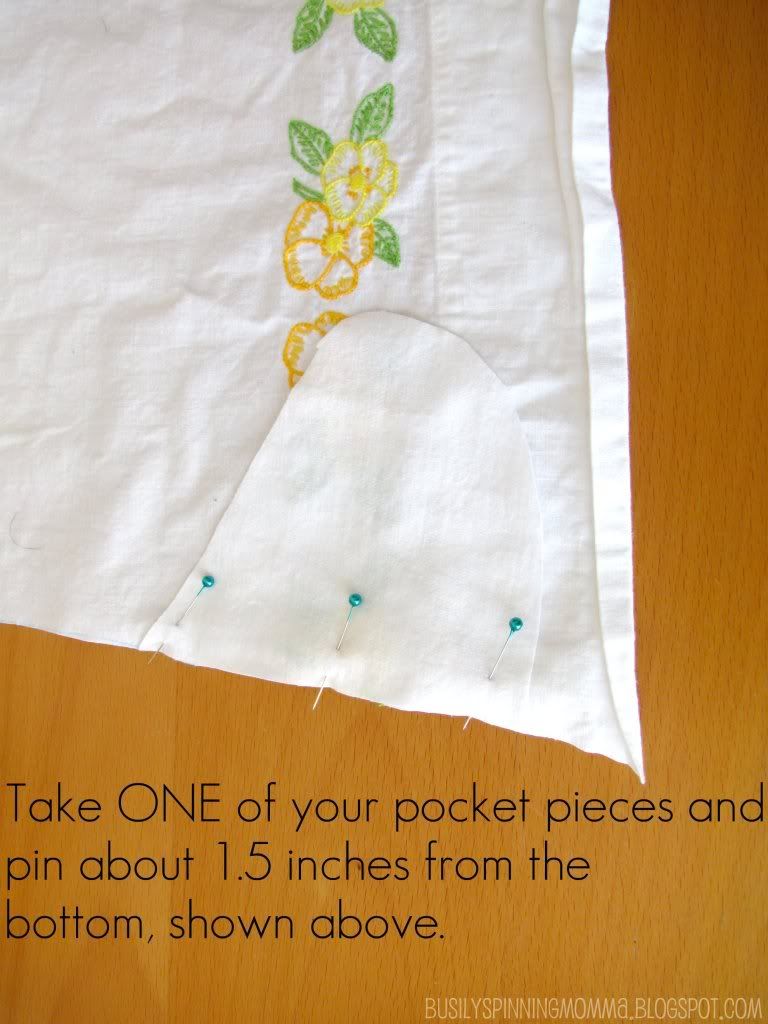
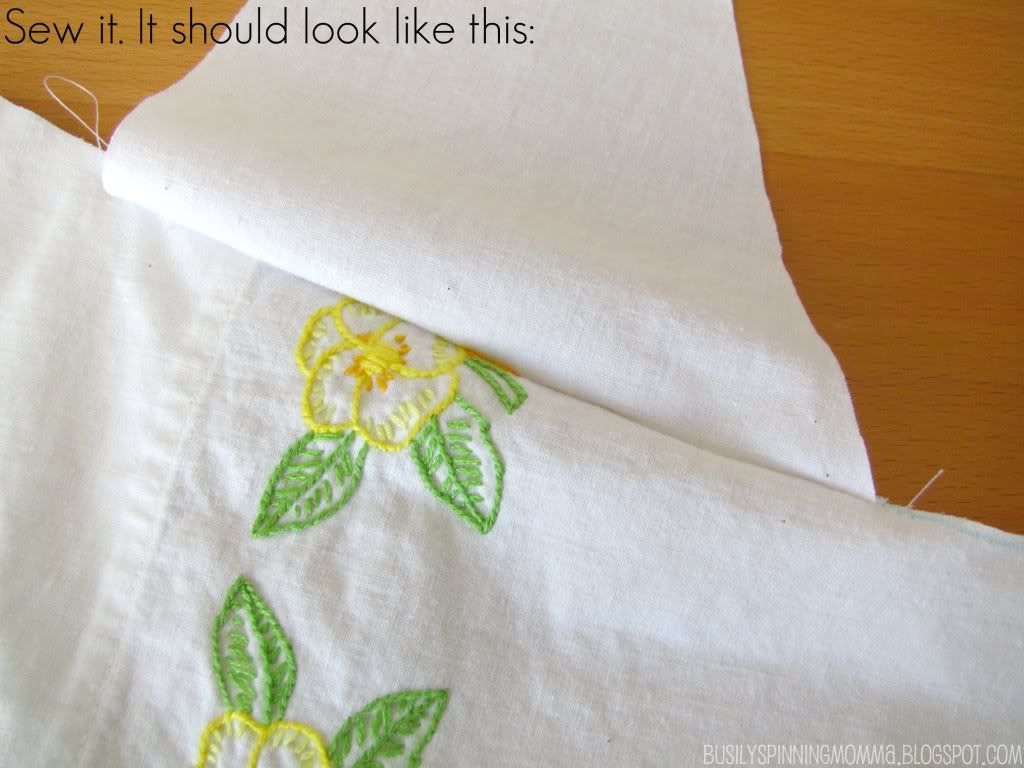
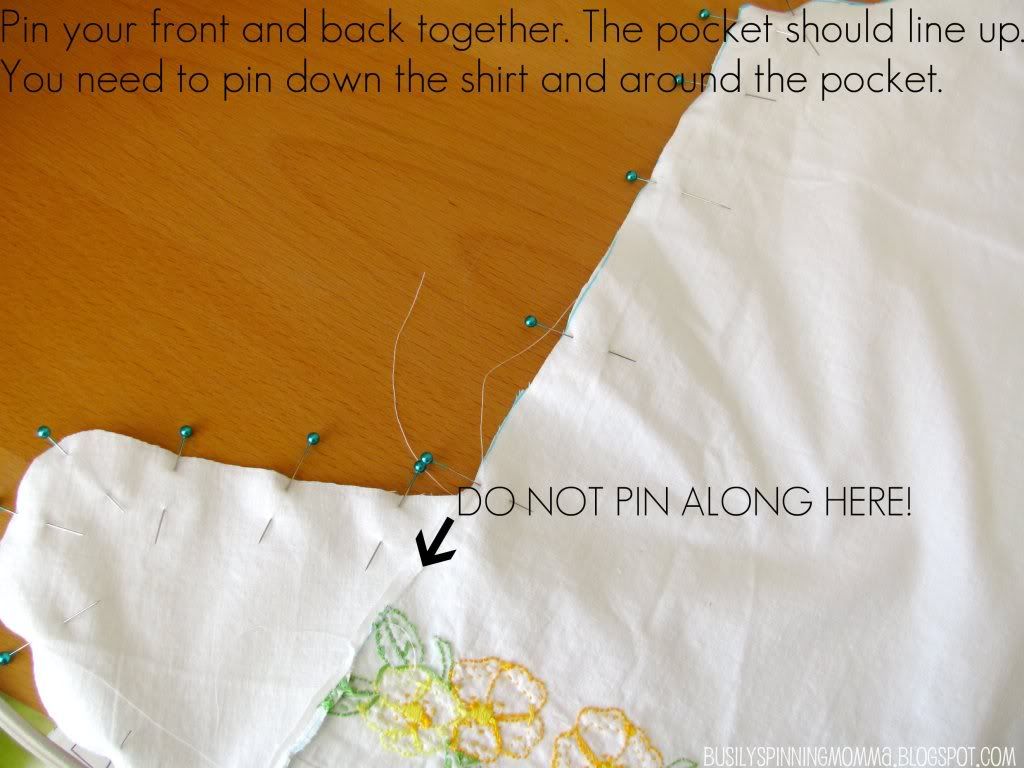
Do this for all four pieces of the pockets. Two on either side of front of shirt. Two on either side of back of shirt. Attach them making sure they will line up. Sew along the pins, right side up.
Iron seams open and flat on the wrong side.
Do NOT sew along where the arrow is!!! You'll close the pocket if you do :(
Okay, I didn't take pictures for this next step :( SORRY!
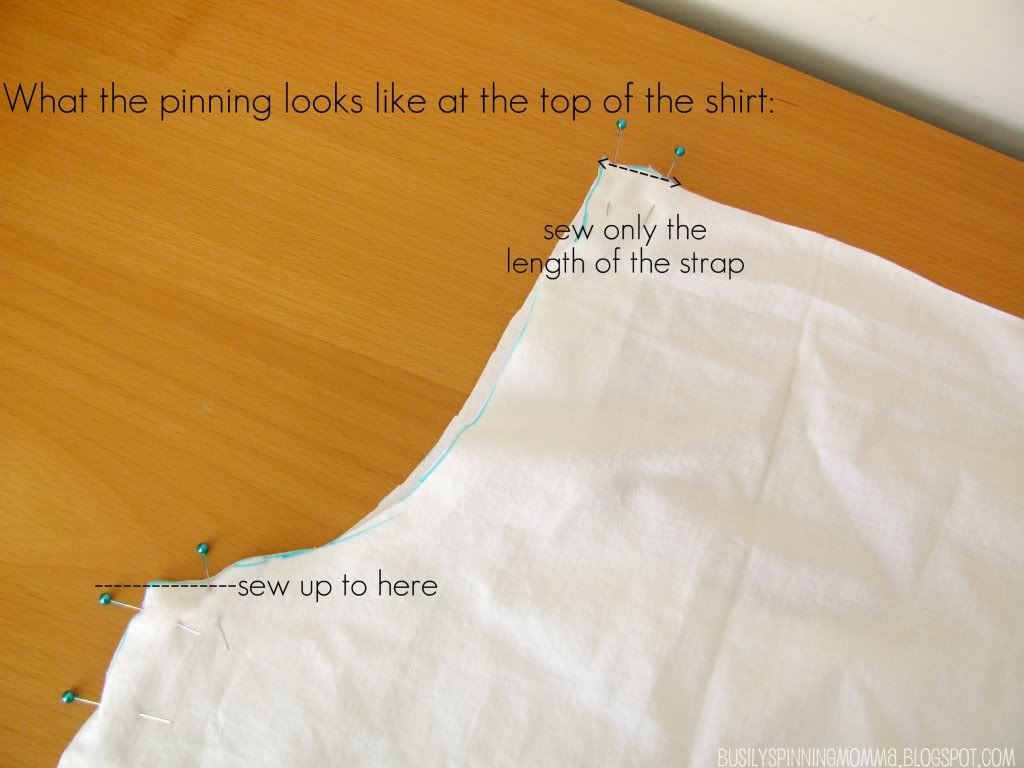
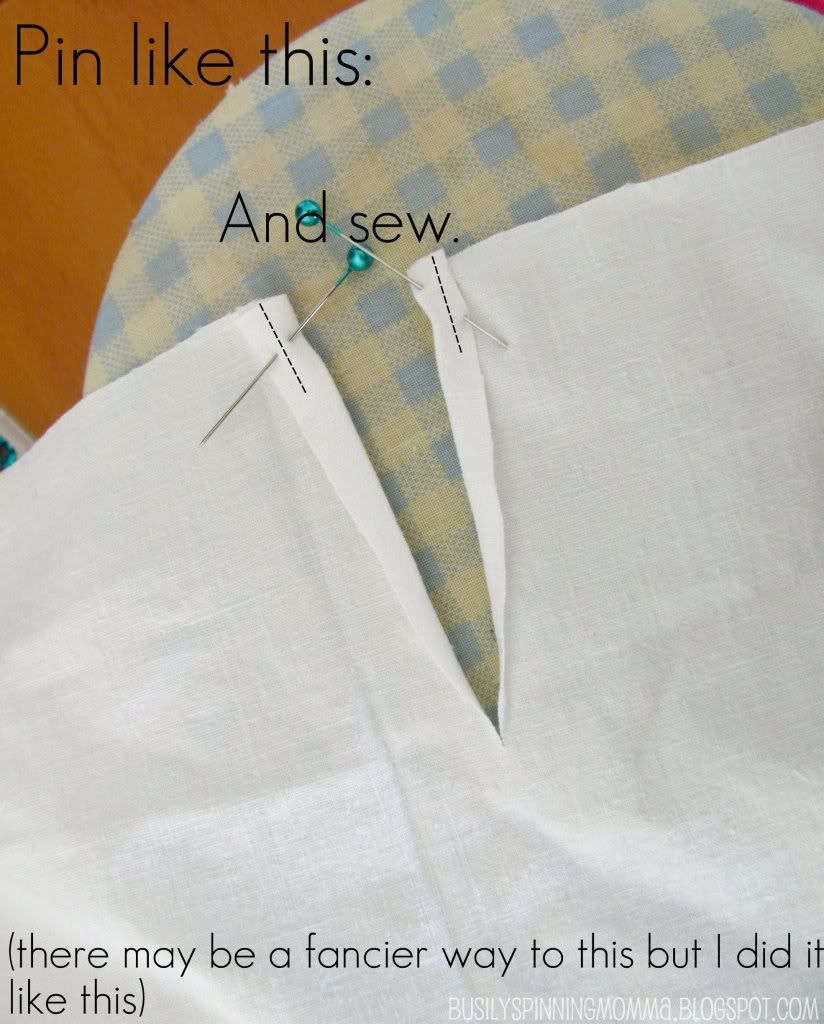
So, here goes: sew along all the pins, creating your shirt. If you have a serger, I'm SO JEALOUS, oh and also, use it now :) Oh, and just in case...make sure you don't sew armholes shut!!!
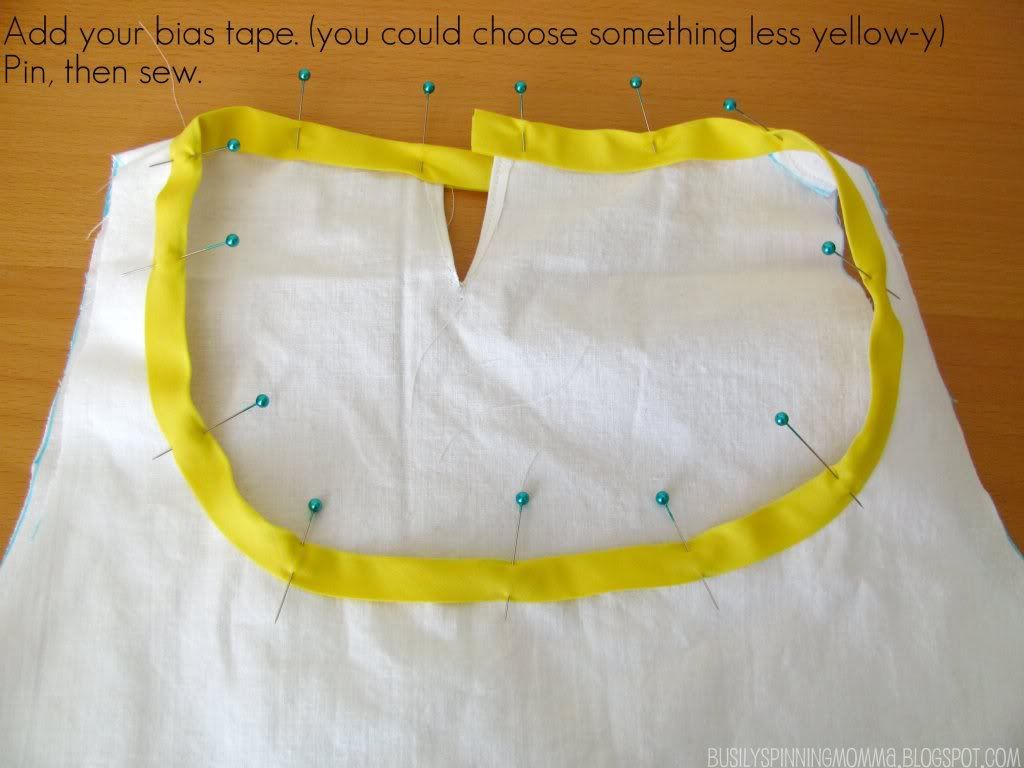
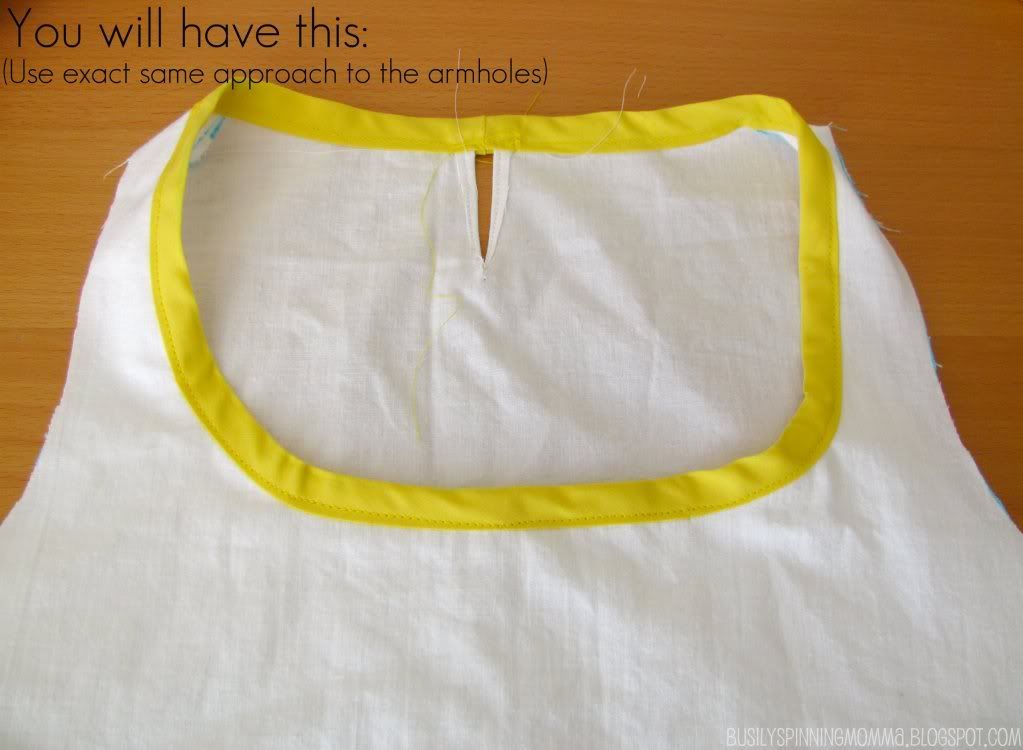
Now to finish the edges with your bias tape:
Don't know how to attach bias tape? DANA has a great tutorial on it!
NOT PICTURED: Do this for the armholes too!
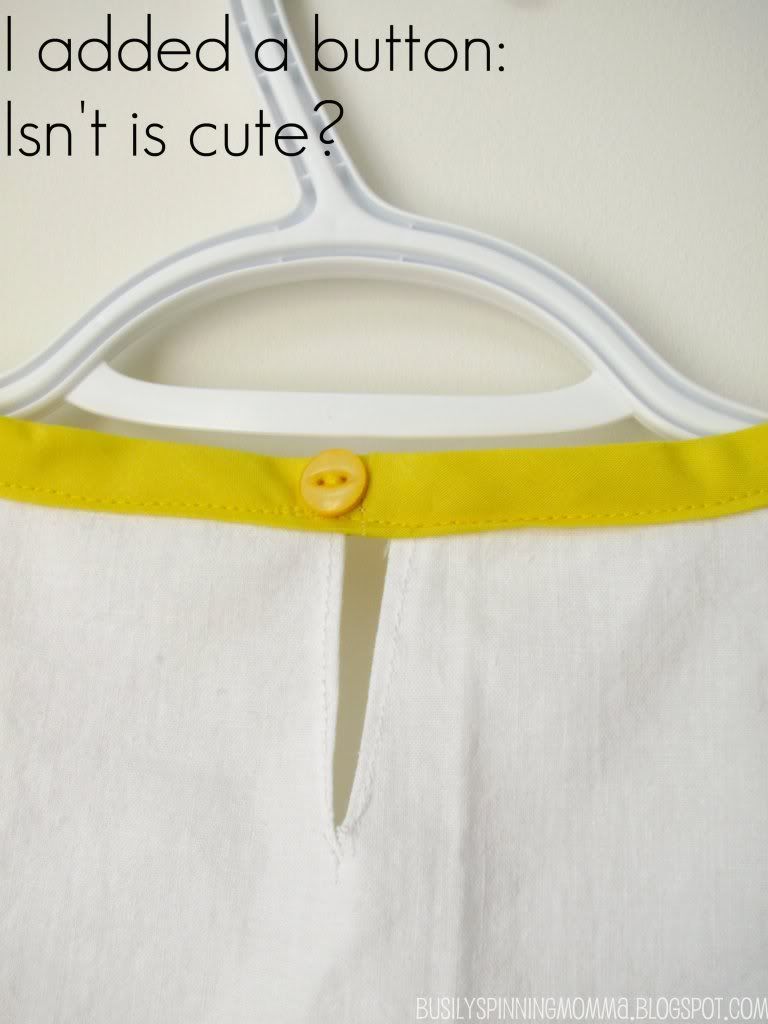
Oh and..
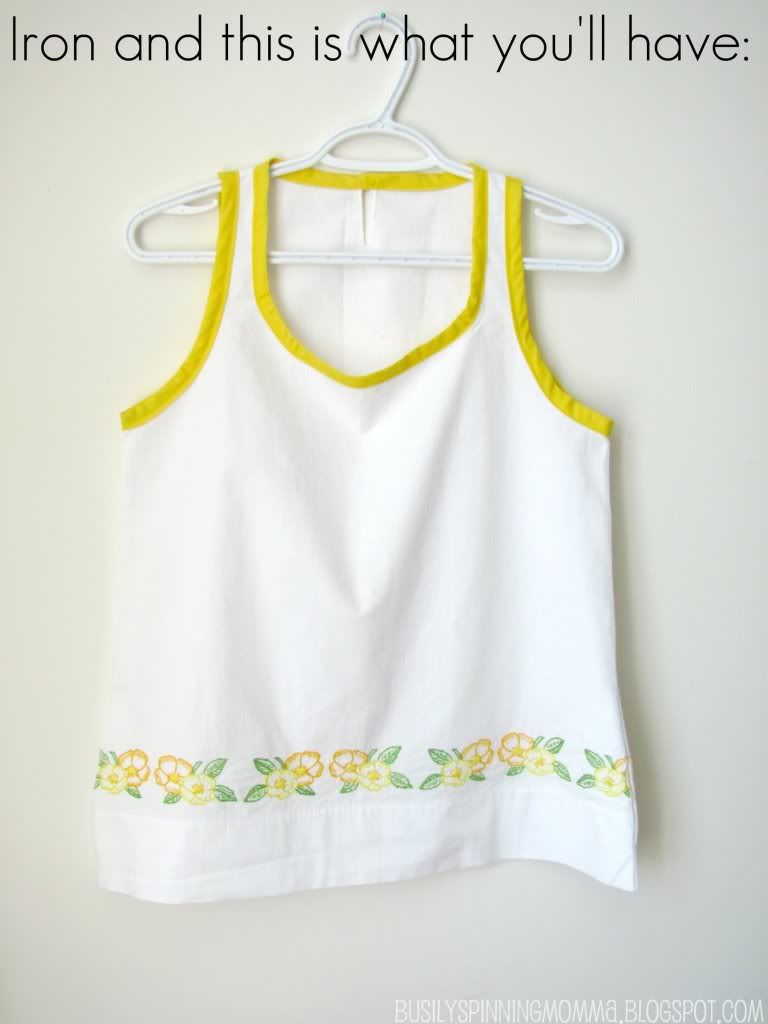
Wear it anyway you want!
And that's all!
A new top out of an old bed sheet...in less than an hour!
Hope you like it and if there's any questions feel free to leave them in the comments and I'll do my best to answer them. Please leave your email so I can email you back the response :)
xoxo, Dorian
LINKED TO:
THESE great parties!!





Love love LOVE this!! Thank you! :D
ReplyDelete~W
Arent you a smart cookie! I cant wait to get my sewing maching going, I have some ideas just festering!!! I'm sure you will adore them, maybe we can do a collabo?
ReplyDeleteYou are brilliant; how are you able to make sewing a new shirt easy? I thought it was supposed to be difficult! Filing this away in my must try list!
ReplyDeleteSo cute! I love the use of the embroidered bed sheet, I like yours better actually! Anthro gives me such great ideas too.
ReplyDeleteEmily
domesticdeadline.blogspot.com
love it! thanks for sharing!
ReplyDeleteWow, what a great idea!! Looks super cute!
ReplyDeleteVery cute! I'll have to try that with some pretty pillowcases I have.
ReplyDeleteWhat a cute shirt! Love this!
ReplyDeleteWow this turned out great! I think I like your version better! I'd love it if you'd stop by my blog and enter the giveaway I'm having for a Dremel Trio.
ReplyDeleteBeautiful! I love the pockets and the embroidery!
ReplyDeleteSuper cute! I have a few sheets that I have bought to make things with, here is one idea!
ReplyDeleteWe would love for you to share this at our link party, Crafty Lassie Tuesday. It ends tonight at 5pm.
www.sewstylishboutique.blogspot.com
We are having a giveaway! Hope to see you there :)
Heather & Rose
super cute! and a great flattering style. adorable!
ReplyDeleteYou are so good and crafty. I love the top. Thanks for sharing.
ReplyDeleteLovely! Gotta try this tut soon. Thanks!
ReplyDeleteGorgeous! And such a great tutorial!
ReplyDeleteI am hosting a new linky party and this project would be perfect to link up to DIY Diva Thursdays. Id LOVE to have you :)
Kara
www.mineforthemaking.com
You are good! What a beautiful shirt:) Thank you so much for sharing your -great- tutorial!
ReplyDeleteHoly cow, this super cool!!! Can't believe it was out of a bed sheet! I also love how it can be worn so many ways. Great job :D
ReplyDeleteShelley
www.westermanfam.blogspot.com
Wow! This is so great! I definitely need to do this! I make pillowcase dresses for my girls all the time but never make myself a shirt.
ReplyDeletewww.jamesandleighann.blogspot.com
O, I so love it! It looks easy (exept that with bias tape), I have to give it a try. (with out bias tape). And, I prefere yours colours, it looks great.
ReplyDeleteThis is so awesome! Now I just need a really cool old sheet and a sewing machine! :)
ReplyDeleteI am a new follower and hope you will stop by and check out my blog. I am having my weekly link party (social saturdays) starting tomorrow!
Jamie
day-and-age-design.com
I love it so awesome! Come on over and link up to Scrappy Saturdays at candacecreations.blogspot.com!
ReplyDeleteOMG this is about the cutest thing I have seen all day. That is so clever to use a sheet. I really need to work on my sewing skills. You should make more and try to sell them to Anthropologie ;) Just LOVely!
ReplyDeleteAwesome..This is wonderful idea..I love love love this embroidery design with white color and pocket.Cute post..:)
ReplyDeletei am in love. this is so sweet --- and that belt again! ugh! ever see another.. grab me one and i'll pay you back! :) :)
ReplyDeleteHey D , I love this shirt and I think it looks good lose ,belted or layered! Xo
ReplyDeleteI am in LOVE with how sweet this shirt turned out! Ohhh you make me want to go and grab some fabric and get sewing! Your tutorial was just great and for sure helped me feel like even I could handle tackling a project like this one! Thanks!!! And thank you SO much for linking up at crafty scrappy happy-me. I am for sure a new follower :o)
ReplyDeleteJaime from crafty scrappy happy
really cool- great model, too!
ReplyDeleteI love this! Thanks so much for sharing. I plan on making mine with a few oversized printed t-shirts in our closet.
ReplyDeleteThis is one of the best ways to make use of those unused clothes and dresses in the closet. I like the idea of making this design. It looks pretty amazing.
ReplyDeletewholesale clothing
Woah! That guy should have basic fashion knowledge. Fashion Police might have him in their front cover soon.
ReplyDeleteThis amazing tutorial has been featured on Mom Prepares: http://momprepares.com/2012/05/17/nine-free-and-awesome-sewing-tutorials-for-mom/3/
ReplyDeleteThanks for this great how-to!
gee that's good..I'm going to try it too..you make it look so easy..thankyou!
ReplyDelete