Nothing says spring quite like flowers, bright colours and sun-shiney days.
Well, I can't help you with the sunshine, but I CAN help you with the other two!
Do you remember this Spring-y necklace from this post?

Wanna make your own?
Glad to hear it! Here's how....
YOU WILL NEED:

-yarn (the thicker the yarn the bigger the flower)
- crochet hook (or safety pin, if you choose to braid)
- felt
-glue gun and glue
necklace to cut apart
-and jewelry pliers or cutter-thingies.
- and scissors...not pictured, but obvious
HERE WE GO!
1. If you are going to crochet, chain 30. Cast off. (I used worsted weigh yarn and 4.5 hook)
If you do not know how to crochet and want to learn go here and then here, for this particular project.
If you do not know how to crochet and don't want to know, just braid about 5.5 inches of yarn LOOSELY.
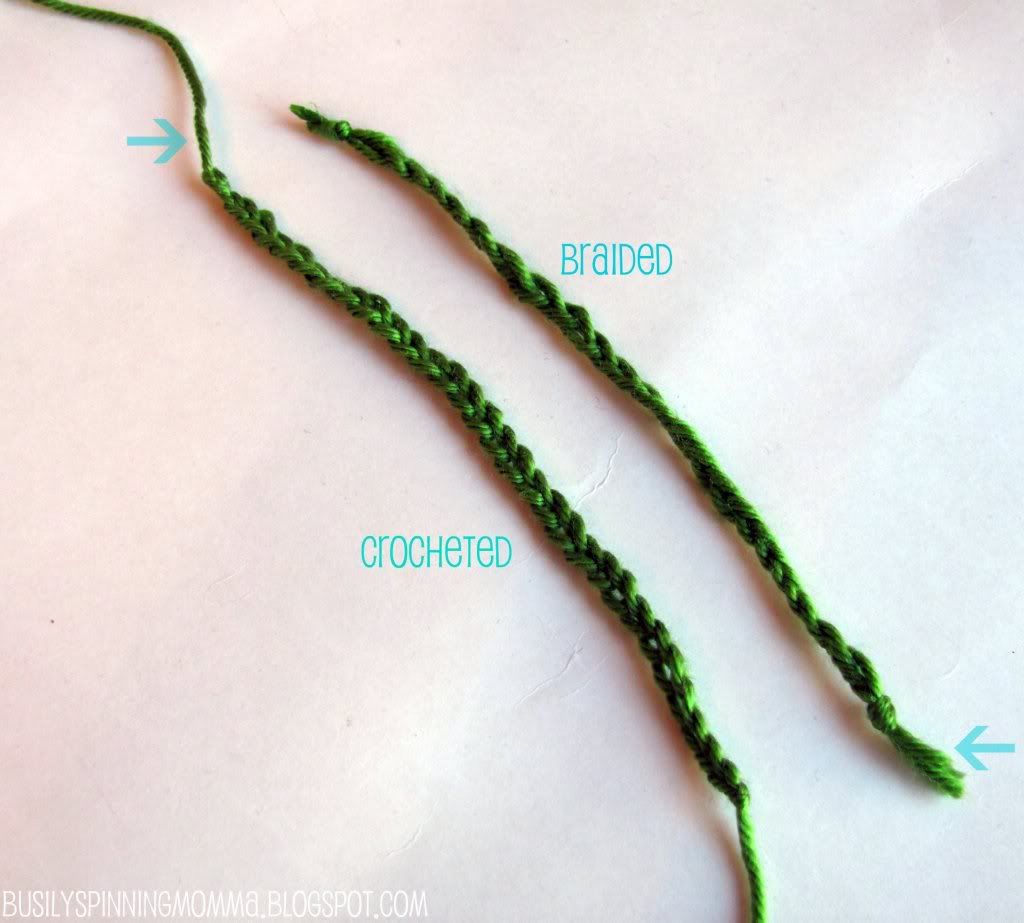
(please note, crochet and braiding look slightly different. With crochet you get a much more uniform look, and the ending and beginning are much neater...see arrows)
2. Next, take your glue gun and dab a touch of glue to your knot (step1 in pic), twist and turn yarn, glue to knot (step2), continue all the way around until you reach other knot (step3) glue end knot to the wrong (under) side of the flower and cut off loose yarn (step4).
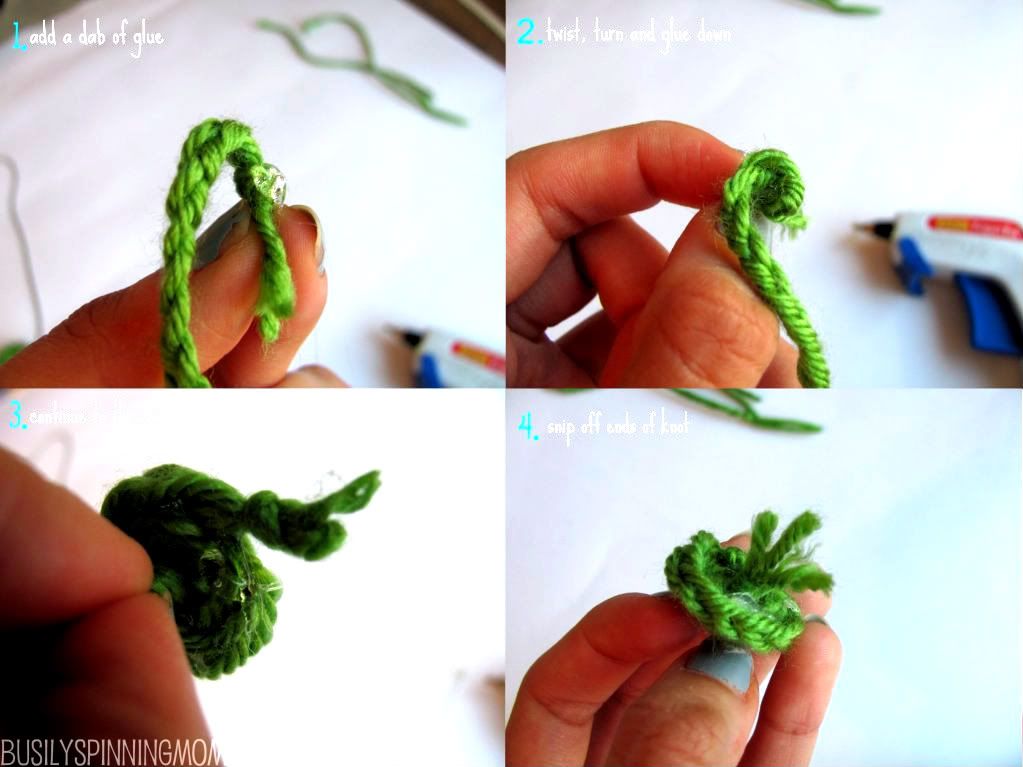
You should have this:
 |
| wouldn't this make a cute ring? |
3. Make three "rosettes". Cut out felt backing in whatever shape you want. Arrange how you want them to look and glue down.
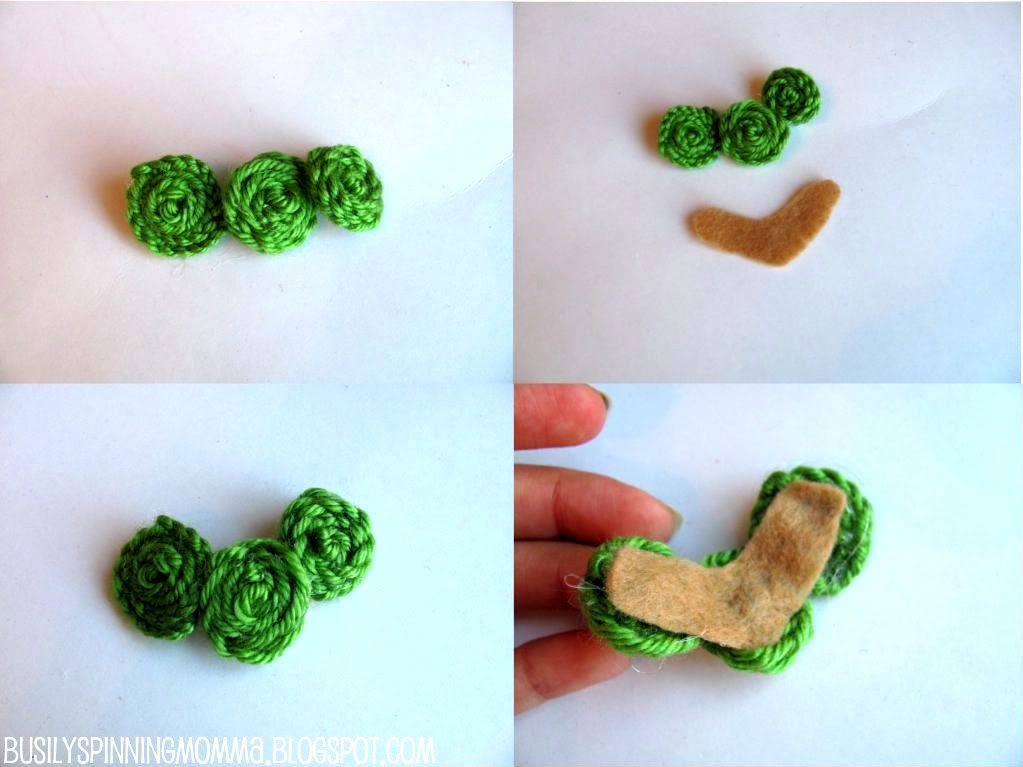 |
| see the happy face? a total fluke! 4. Cut chain to desired length with jewelry pliers and add a dollop of glue to edge of felt ( you will need to cut to small pieces of felt). Next, place chain on glue, add a small square of felt to top while glue is hot to hide the chain. 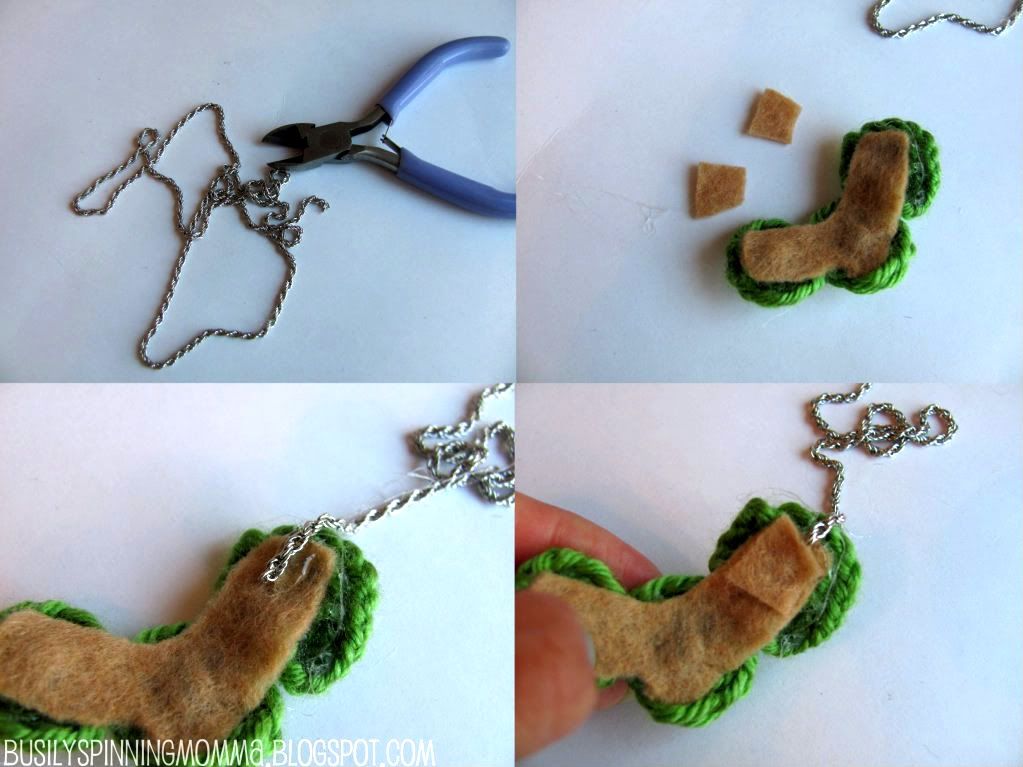 5. Turn around... AND YOU'RE DONE! 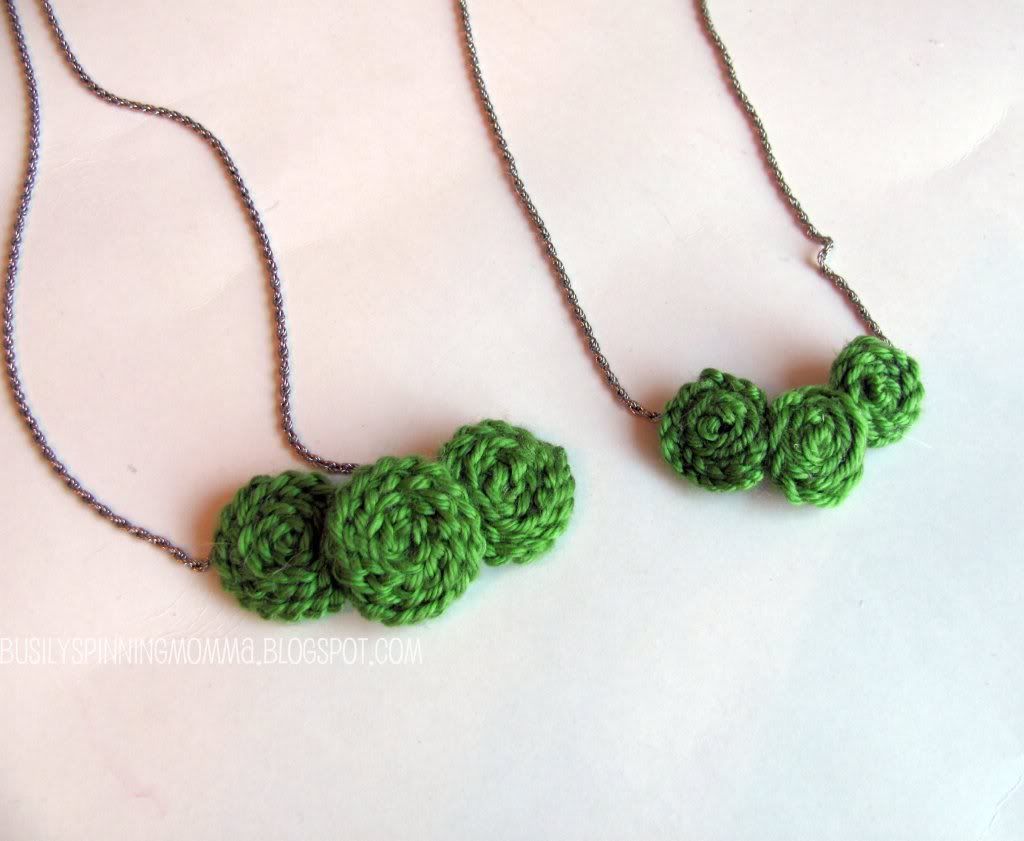 Here is a side by side comparison of the braided and crocheted necklace. The crocheted one is the bigger of the two...see how it look a little more uniform? Wasn't that crazy easy? And it adds a bit of colour to these long (and hopefully last few) winter-y cold days! This tutorial can be found in the "Tutorials" Tab under...  Wanna see what we'll be making next?  Then, stay tuned for the tutorial! LINKED TO: |

So I started reading your tutorial while thinking to myself that maybe one day I would try to make one of the crafts you feature. Well your instructions lost me right away! :oP
ReplyDeletelol Seriously, I think I need to stick to what I know!
Anywho, it sounds like you are all doing well and for that I am happy!
Your first follower. I'm feeling pretty special. :) Love the necklace! It's unique and fabulous.
ReplyDeleteThanks for this..super easy ! even the crochet part ...yay! xo
ReplyDeletethis is amazing! i made it and it worked out perfectly. i love my necklace. i used a different color string, but it still looks good. thank you for the lovely idea
ReplyDeleteLove this project.
ReplyDelete